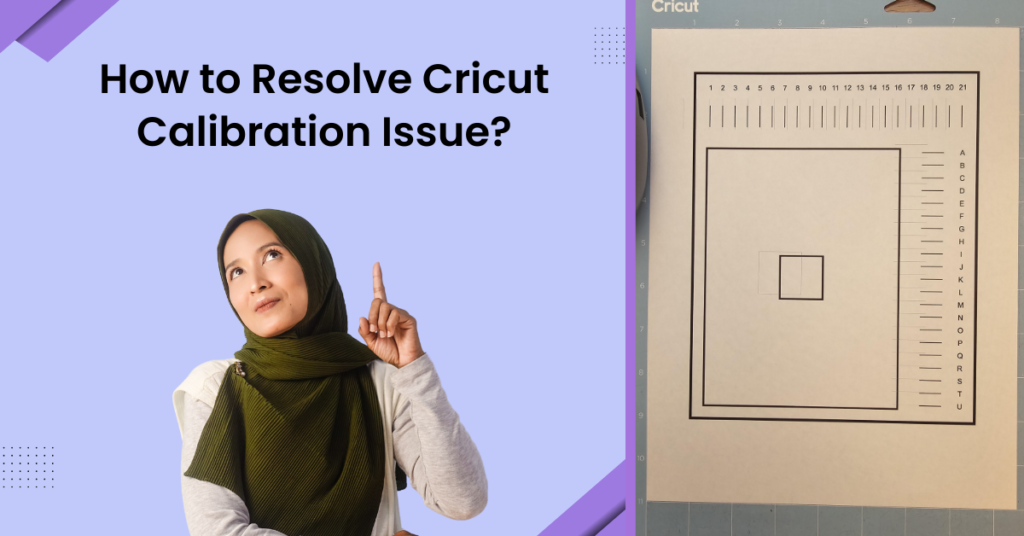
A Cricut machine is one of the most powerful tools you have in your craft toolkit. But, there are instances where you might encounter issues with your Cricut machine. Calibration issues can be one of them, which can be very frustrating. These problems may occur when the machine isn’t cutting or aligning materials correctly according to the specified design.
Are you having calibration issues in your Cricut machine? You may see off-center cuts, overcutting or undercutting, or inaccurate dimensions. All of these may affect the quality of your crafting projects. So, what to do to resolve the Cricut calibration issue? You would need to follow specific troubleshooting steps.
We have mentioned the steps to resolve the Cricut calibration issue. With the right solutions, you can ensure accurate cuts and enhanced performance. So, let’s learn more about resolve Cricut calibration issues.
Solve The Cricut Calibration Issue With The Ideal Steps
Cricut calibration issues are solvable when you are wary of the proper troubleshooting steps. Here are the two methods you can apply to resolve the Cricut calibration issue:
Method 1: Perform a Forced Firmware Update
Step 1: Press and hold the power and the arrow buttons together for 15 seconds.![]()
Step 2: The power button will turn solid red, and the arrow button will turn solid white.![]()
Step 3: Unplug the machine from the power source, then plug it back in after two seconds.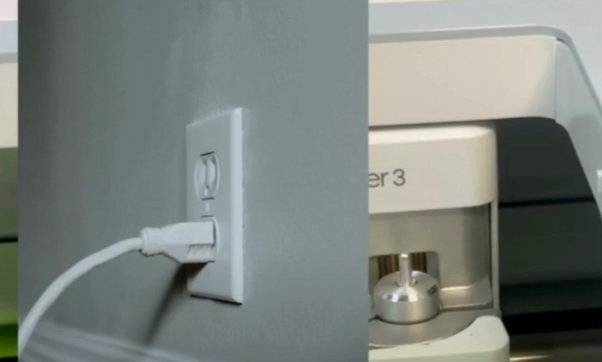
Step 4: Turn on the Cricut machine.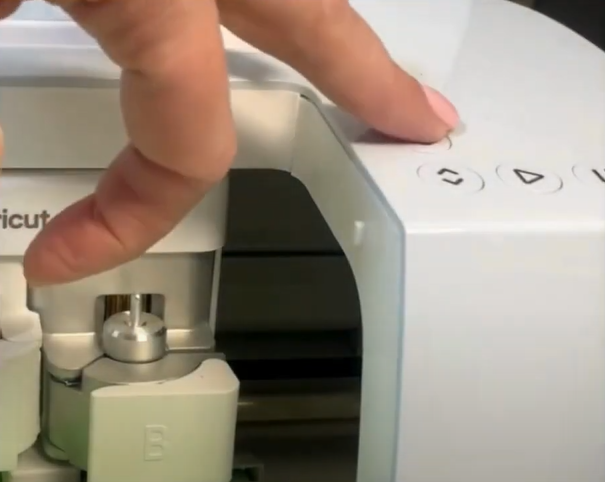
Step 5: Open up Cricut Design Space again, click the three bars next to Home, and select Update Firmware.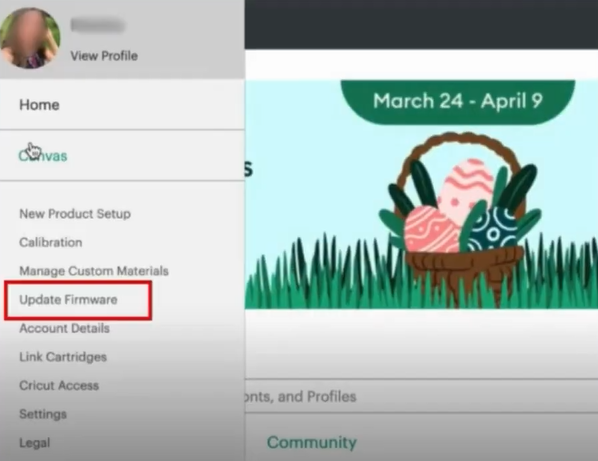
Step 6: Select Smart Cutting Machine, then Select your machine.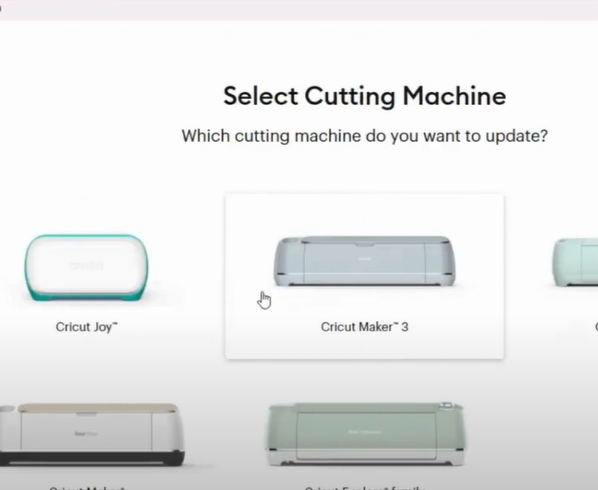
Step 7: Click Next through the Prepare Workspace and Find an Outlet screen.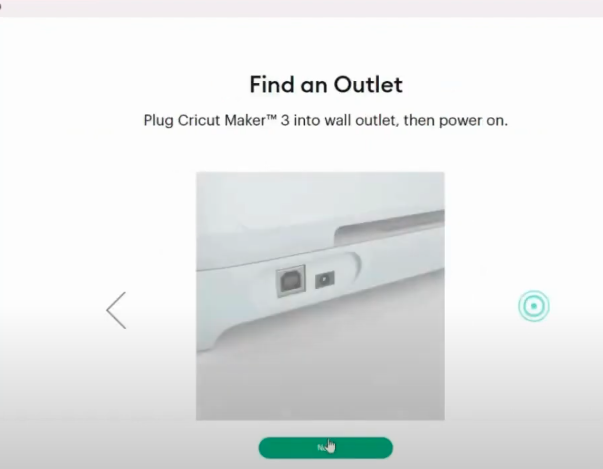
Step 8: Select the connection type, then click update.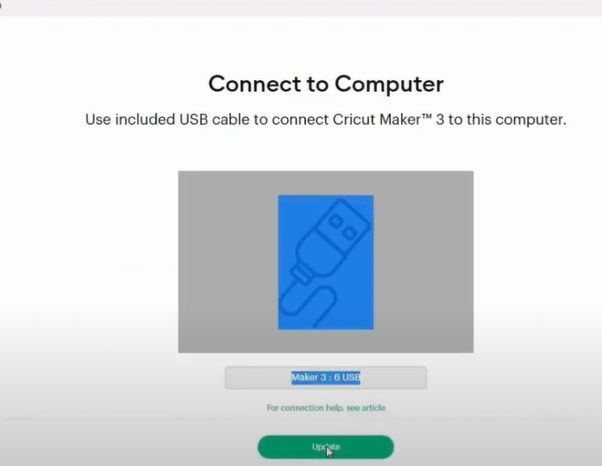
Step 9: Once the update is complete, click Done.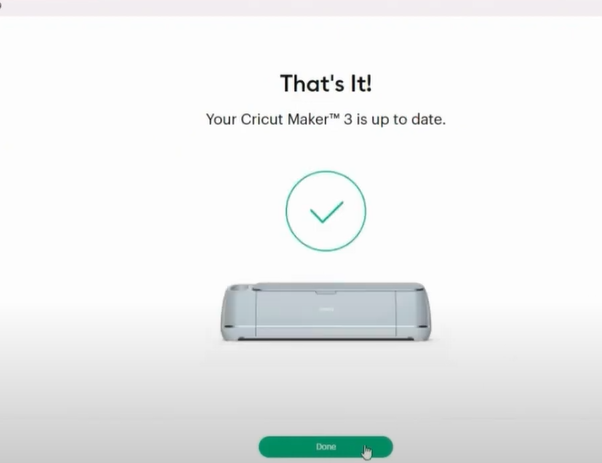
Step 10: Now, go ahead and try to calibrate.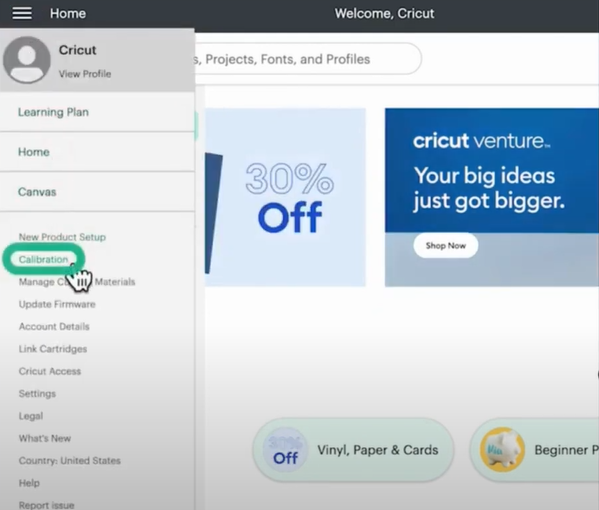
Also Read: How to Setup Cricut Joy Xtra?
Method 2: Reinstall Cricut Design Space
Step 1: Click on the Windows search icon, search Control Panel, and open it.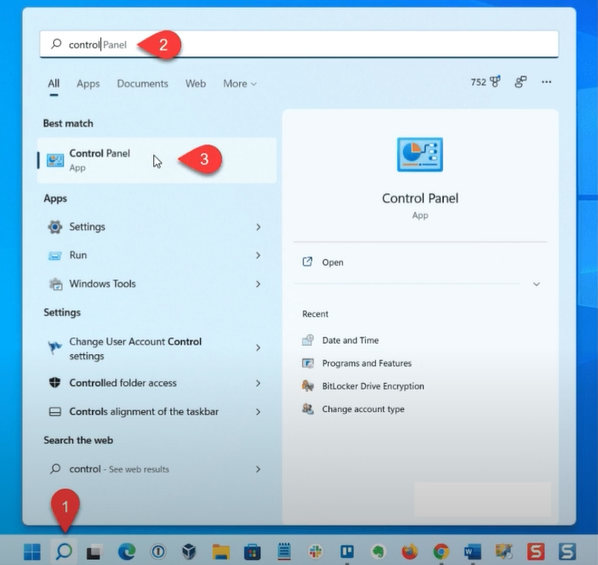
Step 2: Open Programs and Features, then scroll and locate Cricut Design Space.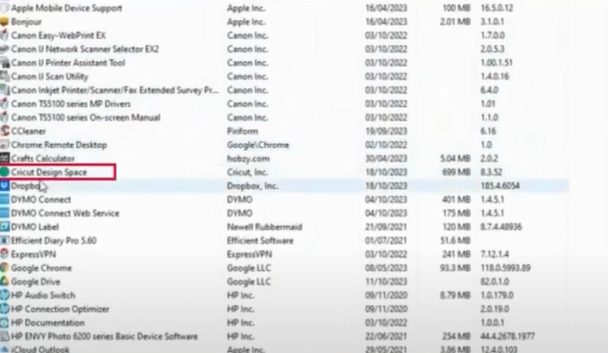
Step 3: Select Cricut Design Space, click Uninstall, then click OK on the pop-up window to proceed.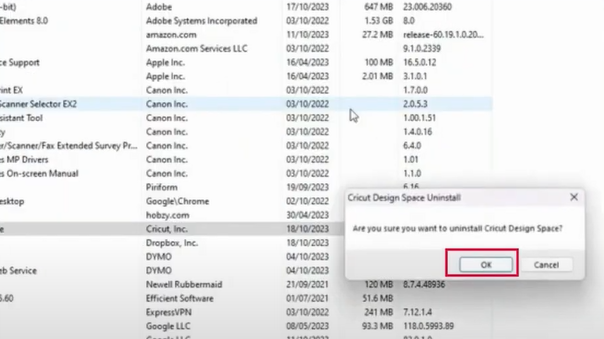
Step 4: Close the Windows and open the Files folder.
Step 5: Go to the Windows (C 🙂 drive and open the Users folder.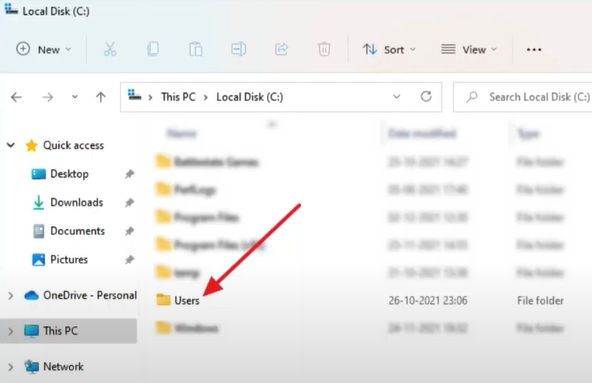
Step 6: Select the folder you are logged in to.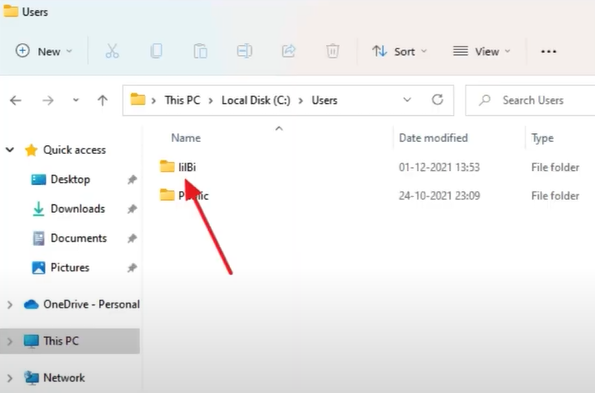
Step 7: Open the Cricut Design Space Folder.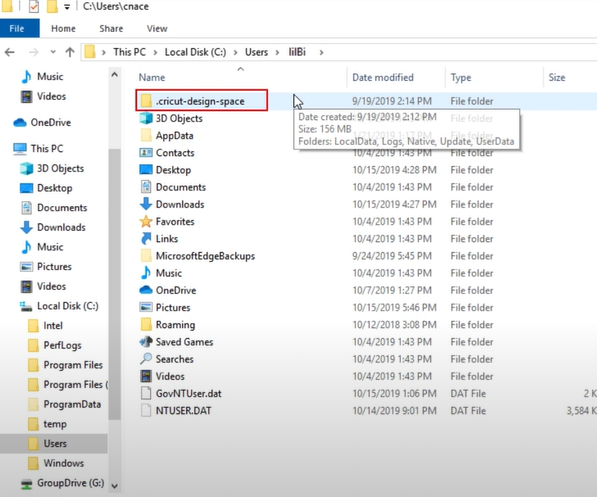
Step 8: Open the Local Folder.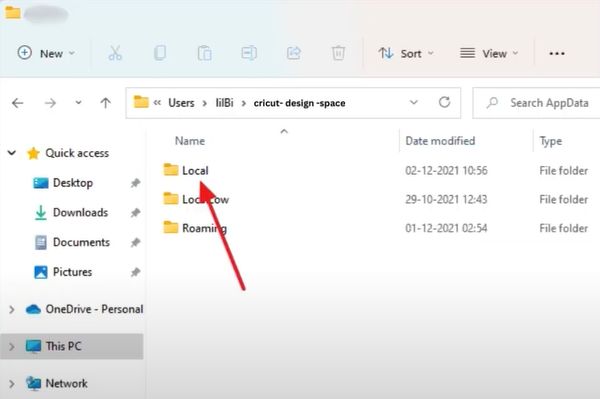
Step 9: Select the files within the folder and then click the Delete icon in the toolbar.![]()
Step 10: Once done, close the window, right-click Recycle Bin, click Empty Recycle Bin, and click Yes on the pop-up window to proceed.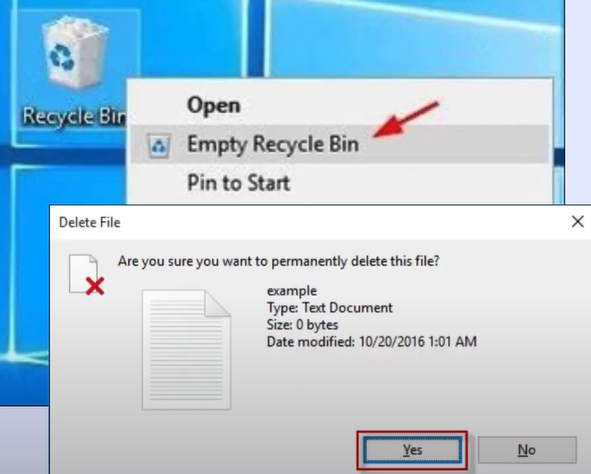
Step 11: Close the window and restart your computer.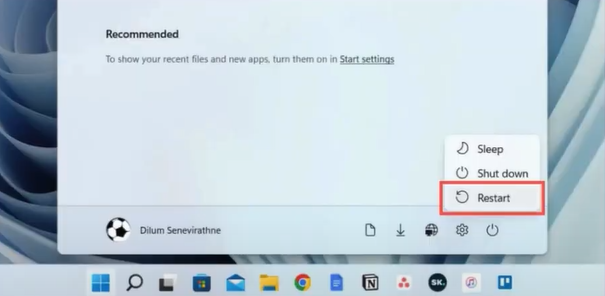
Step 12: Once the system powers back on, open the web browser and visit the official Cricut Design Space.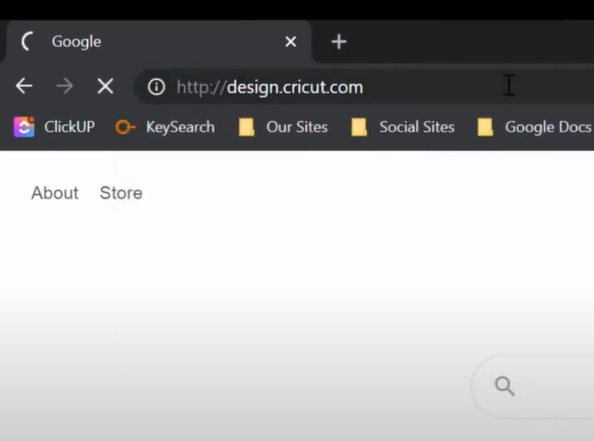
Step 13: Check the I agree to Cricut Terms of Use and Privacy Policy box, then click Download to download the latest version.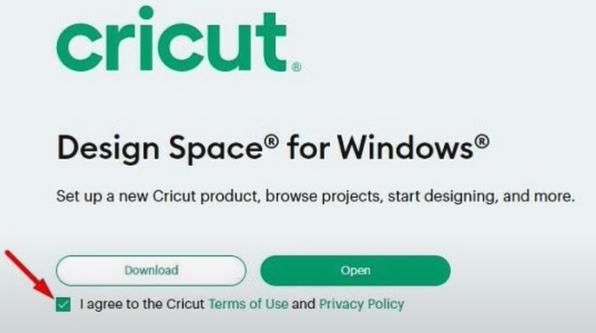
Step 14: Open the downloaded file to install Cricut Design Space.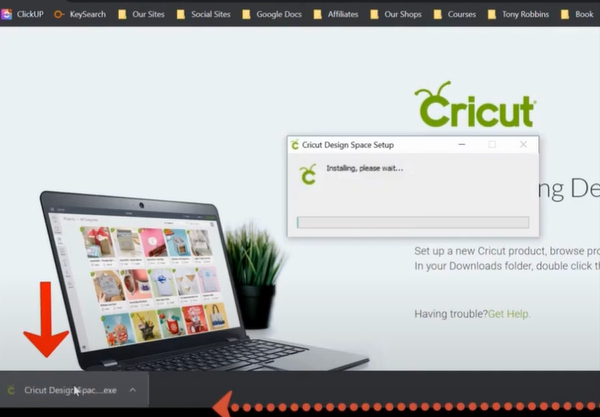
Step 15: Once done, go ahead and try to calibrate and see if the issue is resolved. 
Conclusion
That’s all we would like to share in this write-up on resolve Cricut calibration issues. If the problem persists even after trying the above-mentioned steps, you must reach an expert.