How to Make a Doormat With Cricut Maker? [Complete Guide]
First impression is the last impression!
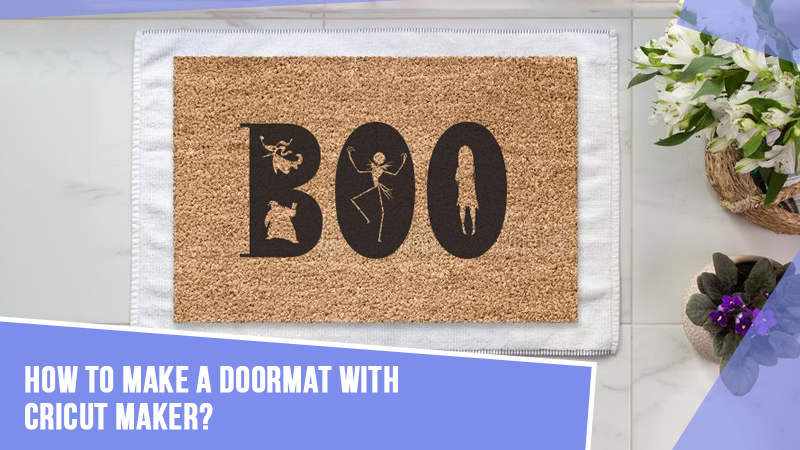
A customized doormat portrays the feeling of welcoming friends or family members with lots of love and gratitude. Besides, they are also found in apartments or business places. This item gives the surroundings a festive touch and is available in different sizes and shapes.

With Design Space software, it gets much simpler for the crafter to develop the doormat by accessing its library, tools & other features. If you want to collect data on how to make a doormat with Cricut Maker, this post belongs to you. Here you will get the chance to design this project with an electronic cutting machine.
Step 1: Create a Design on the Cricut App
- First, you must open the Design Space app and sign in with your login details.
- Under the Menu panel, tick the Shapes tool and choose a specific shape.
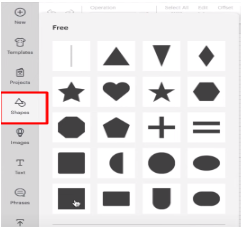
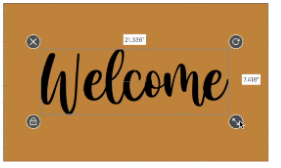
- After choosing the shape, change its color and press the Text box to enter the message.
- Next, you need to note down the text by choosing a particular font, size & color.
- Now, you must press the Images tool and select the image from the library.
- After finalizing the design, start placing it on the design by changing its shape, color and placing its copies on the sides.
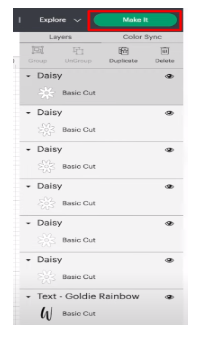
- Before cutting the material, don’t forget to hide the shape, as it has been used as a template.
- Next, you are suggested to click the Make It box visible on the top right side of the screen.
Step 2: Prepare Your Design
- After completing the doormat design, purchase the material from Cricut’s official website, Amazon, or a nearby crafting shop.
- Start unrolling the fold, place it on the Cricut mat, and cut the end with the Rotary Cutter.
- Next, you need to use the Brayer Tool to press the material flat on the cutting mat with gentle hands.
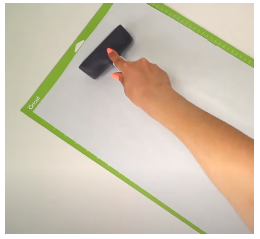
- Apart from the brayer tool, you can also use Painters Tape to cover the mat edges.
- Now, go back to the Design Space and decide on the materials from the All Materials list.
- After finalizing the material, change the pressure mode from Default to More option.
Step 3: Cut and Remove Materials
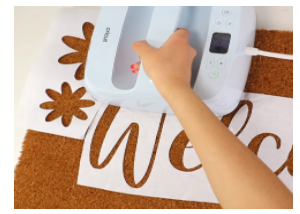
- After completing the material preparation process, insert your Cricut cutting mat inside the Maker version.
- Press the Go button, and the machine will start cutting and printing the material.
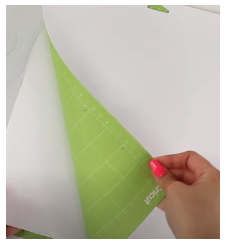
- Once the process comes to an end, smartly remove the material from the Cricut mat.
- Next, start weeding the design with your hand or a weeding tool.
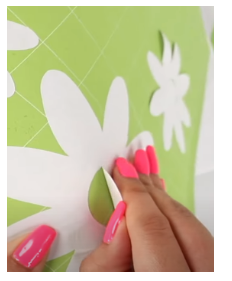
- On the contrary, you are guided to keep the design small designs safe for future reference.
Step 4: Place and Press the Material
- Further weeding out the design, clean the coil mat with a lint roller and then place the stencil on it.
- Next, align the text on the mat, adhere it, and place small pieces between the letters.
- Followed by this, pre-heat a Cricut Heat Press at 315*F and use it to adhere to the design covering the whole mat.
- After completing the processing process, take the mat to a well-ventilated area.
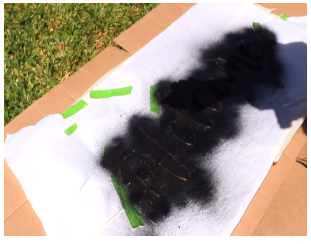
Step 5: Final Reveal
- Next, you need to start spraying on the design with slow pressure in an equal ratio across the design.
- Try to do at least three coats on the design, leaving each coat dry before applying another.
- Wait for a few minutes till the spray completely gets dried up and gets absorbed on the Cricut coir mat surface.
- Lastly, slowly remove the cover to reveal the final design and place it on your office entrance.

Finishing this blog segment, to get the best quality personal door, you need to pay special attention to all the steps included in how to make a doormat with Cricut Maker.
FAQs
Question: What Items are Required to Make a Custom Doormat from Cricut Maker?
Answer: To create the custom doormat from the Maker cut-die machine, all the crafters must buy the following supplies. It’s relevant for the users to ensure the supplies are used appropriately. With the help of these supplies, the DIYer will get the desired result.
- Coir Doormat
- Cricut Maker Machine
- Design Space Account
- Cricut Cutting Mat
- Painters Tape
- Brayer & Rotary Cutter tool
Question: Is It Compulsory to Use the Cricut App?
Answer: Followed by the electronic cutting machine, Design Space plays a crucial part in the process. This app works with the cutting machine and helps the crafter create the design on Canvas. Besides, the user can use text, shapes, patterns & colors tools during design. Other than that, the software transfers the design to Maker for crafting purposes.
Question: What are Different Projects Can Be Created With Cricut Maker?
Answer: If you have recently purchased the Maker machine, it can create numerous projects with its tools & accessories. The DIYer can use the projects to make money and start their own business (full-time or part-time). The list of the primary projects includes:
- Custom Letterboard
- Polka Dot Faux Leather Bag
- Animal Shirts
- Fabric Buntings
- Leather Book Cover Journals
- Monogram Necklaces
- HTV Tote Bags
- Terra Cotta Pots