
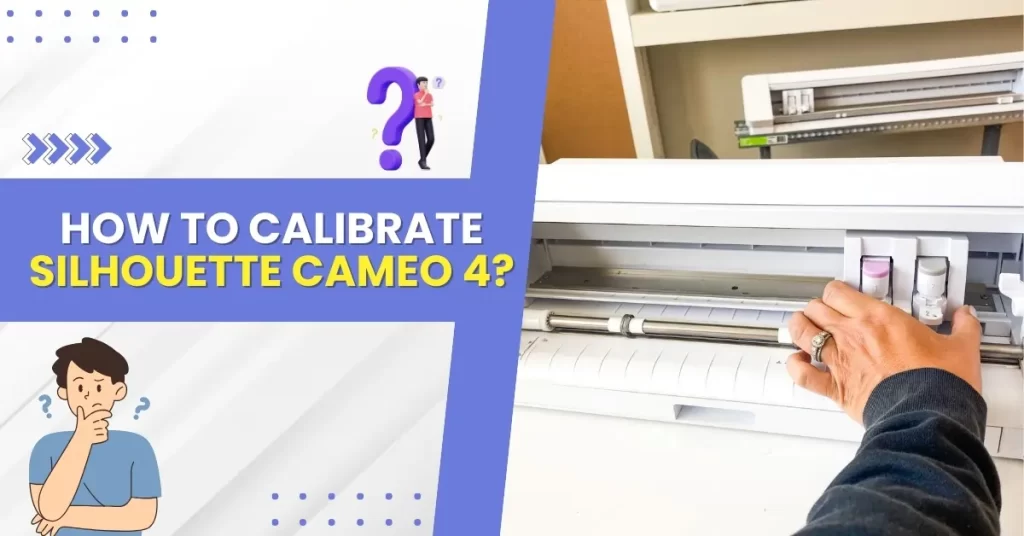
In addition, if the machine shows a cutting problem, then the best solution is to perform the calibration. However, Silhouette machine calibration is a lengthy and tricky procedure that requires in-depth understanding to complete, which not many people know. Want to learn the complete process of calibrating the Silhouette Cameo 4 machine? The tutorial below will help you grasp the full understanding of the process.
Precautions to Take While Calibrating Silhouette Cameo 4
To successfully calibrate your Silhouette Cameo machine, here are some points you must keep in mind.
- The calibration process can be time-consuming, so ensure you have enough time before starting.
- Make sure the area where you are calibrating the device is well-lit.
- Insert the paper/cardstock properly into the device to get perfect cuts.
- Use the latest version of the Silhouette app for the best performance and cut.
- Ensure that you are using the sharp blade and that it is inserted properly.
- If needed, perform calibration multiple times to achieve precise cuts.
Steps to Calibrate Silhouette Cameo 4 Machine
Here is the proper stepwise procedure to help you calibrate your Cameo 4 machine.
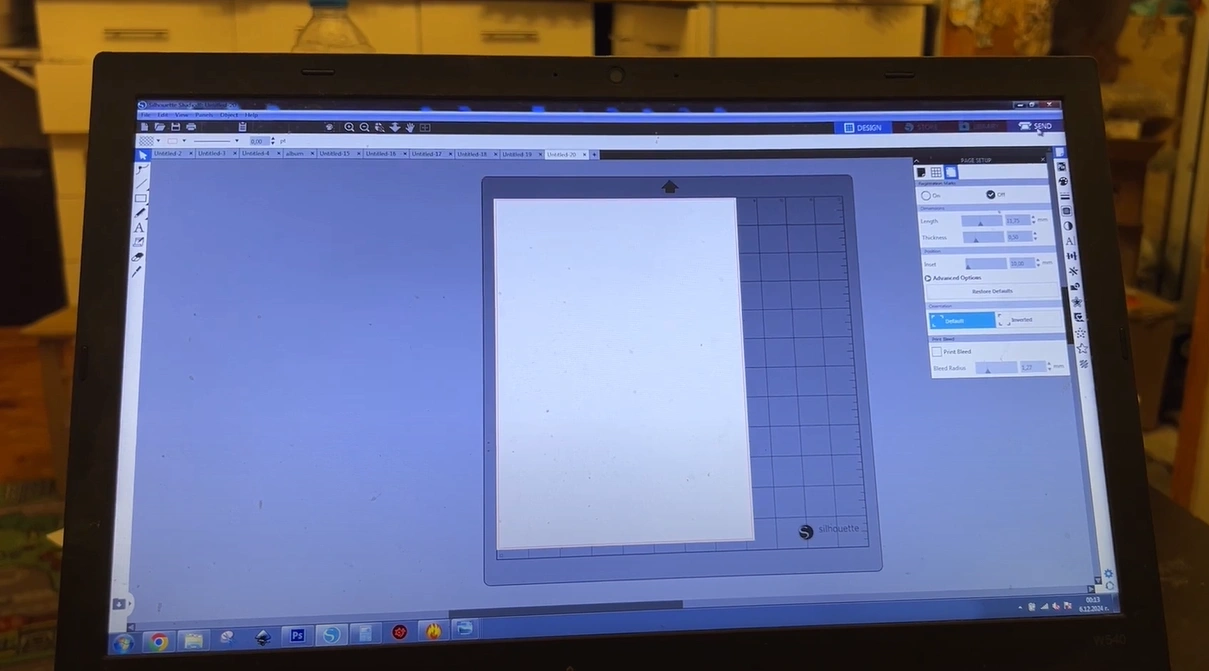
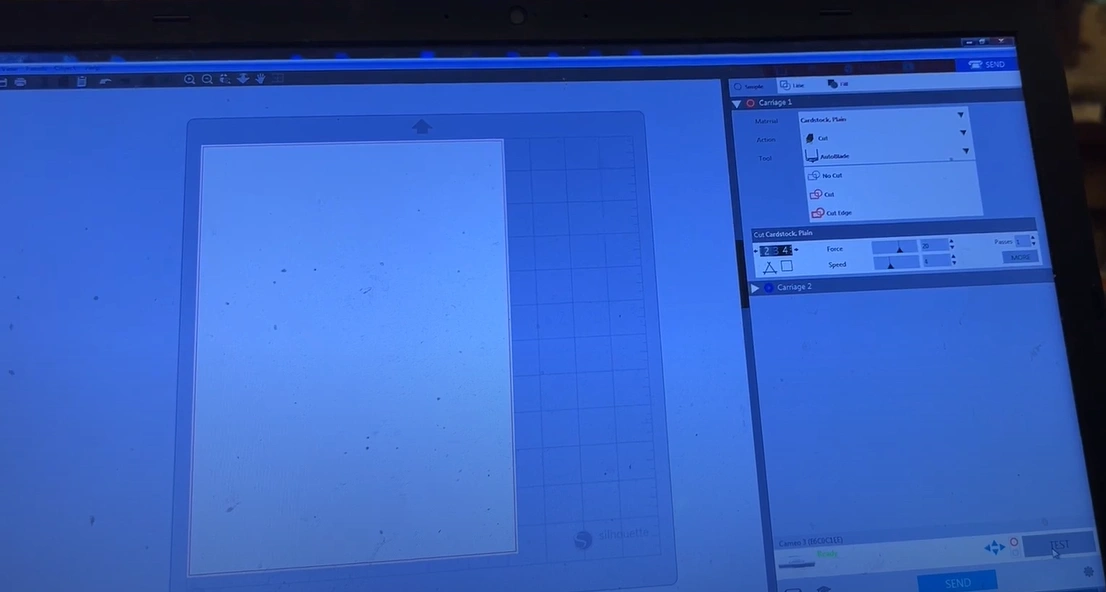
1. Open the empty canvas in the Silhouette Studio app on your device.
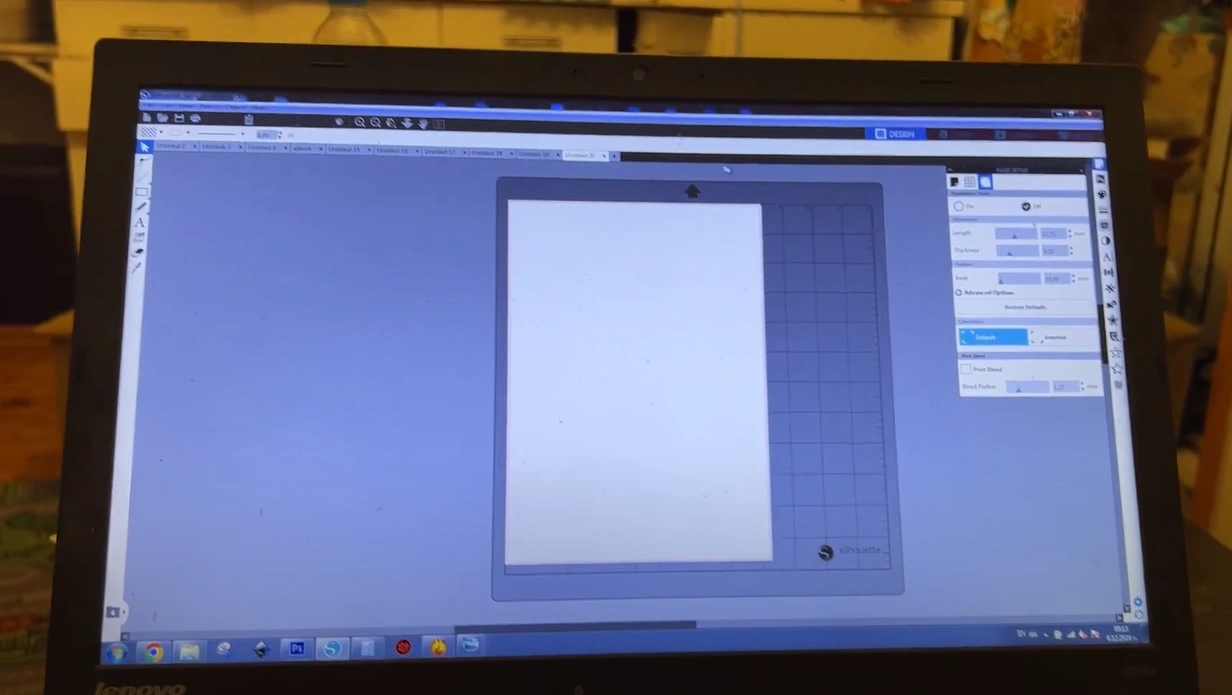
2. Then, click on the Send option on the top right side of the screen.
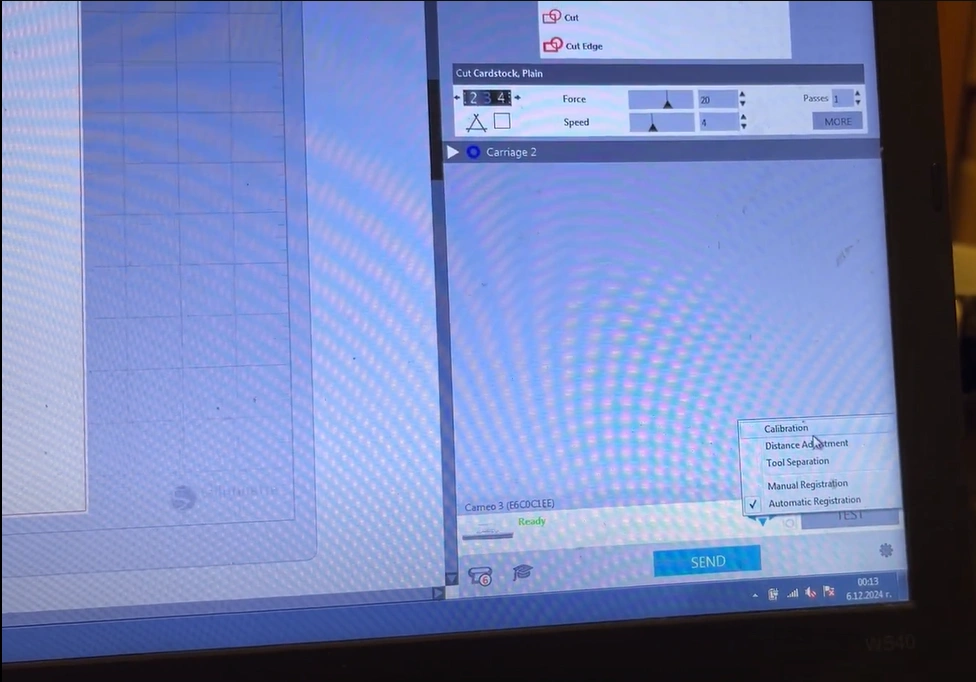
3. Move to the bottom left side to click on Test and then select Calibration.
4. After that, the intersected lines will appear on the canvas.
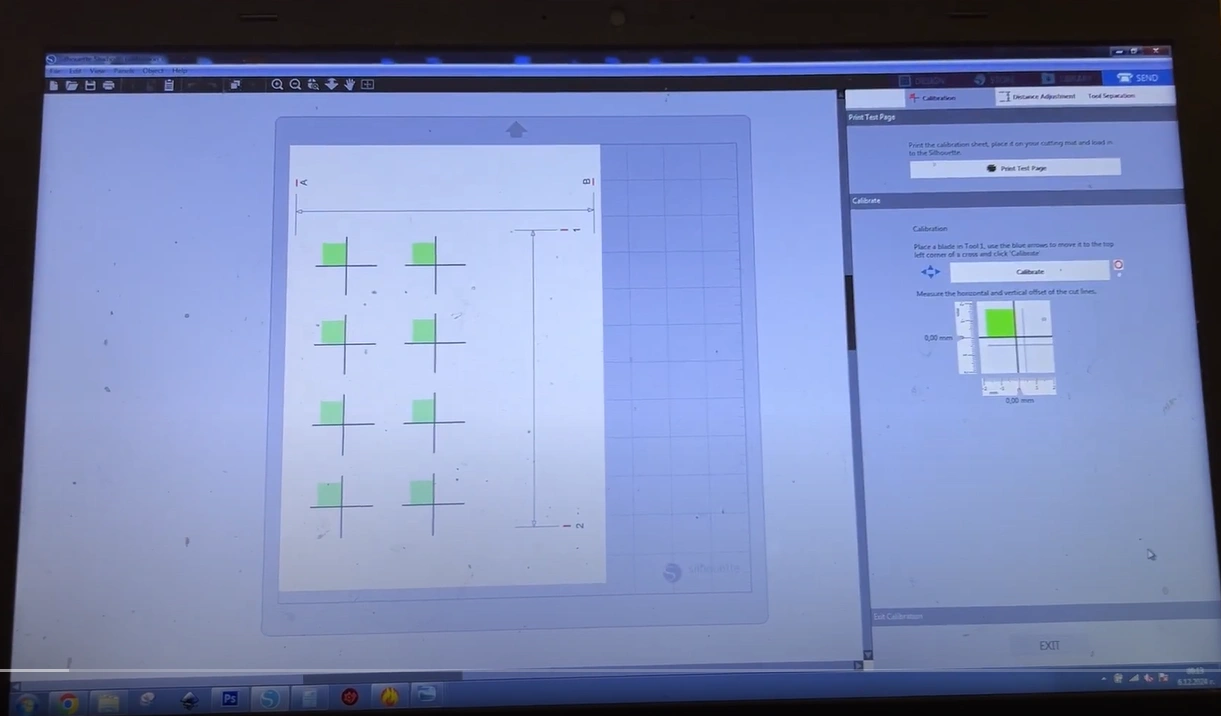
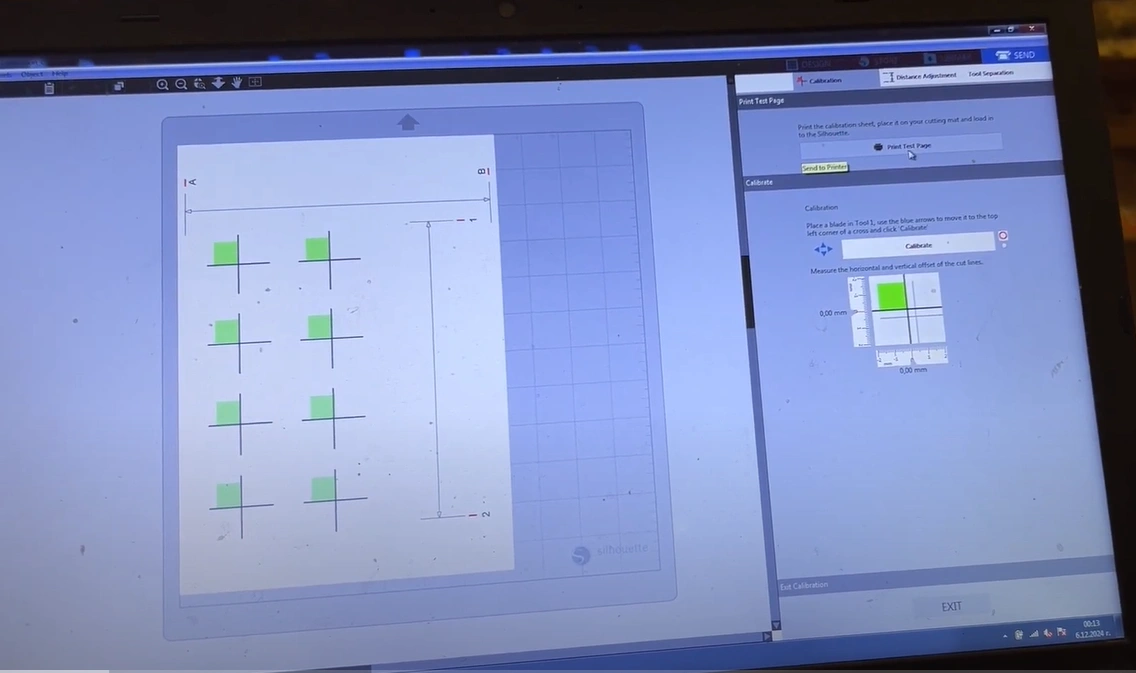
5. Select the Print Test Page option.
Also Read:- How to Put Writing Pen in Cricut Explore Air 2
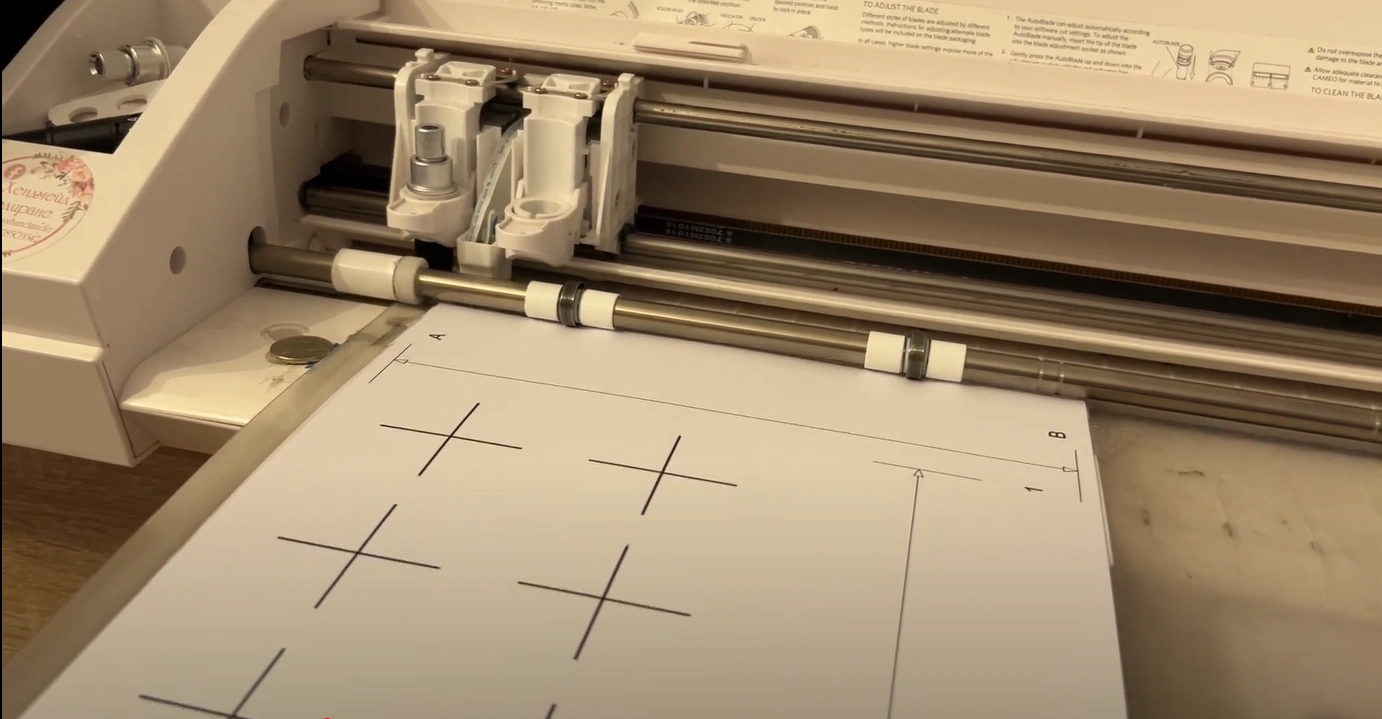
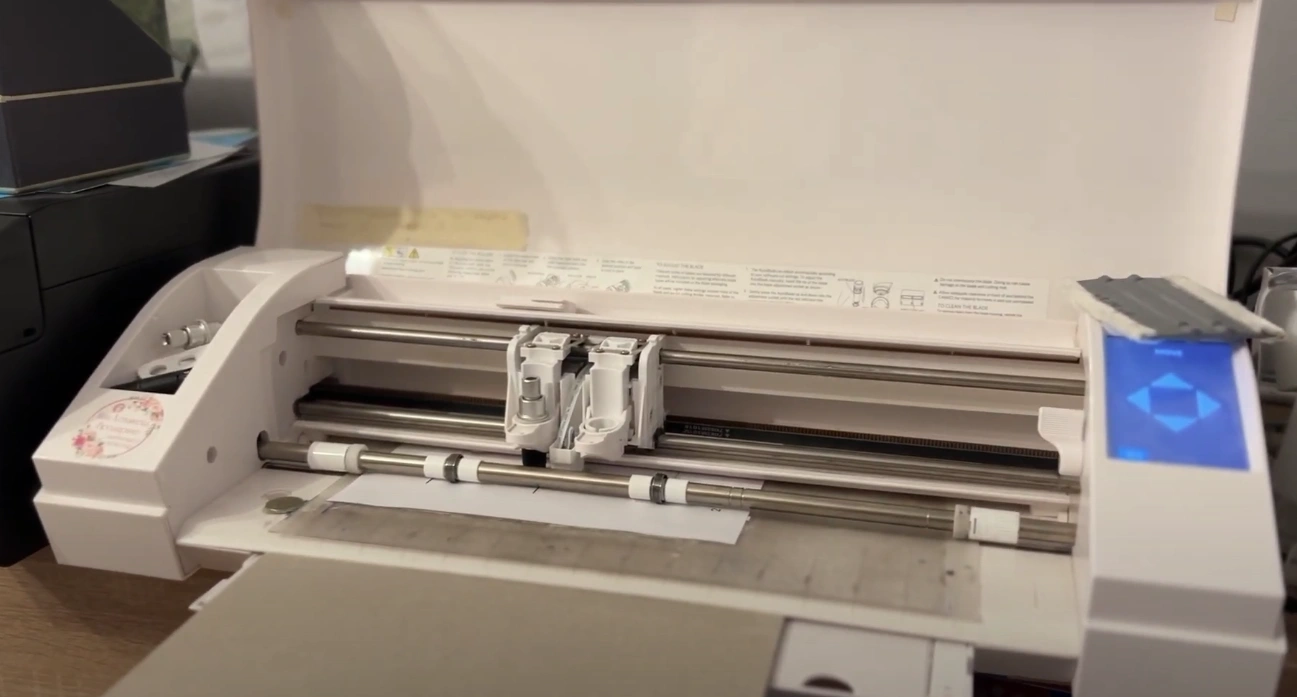
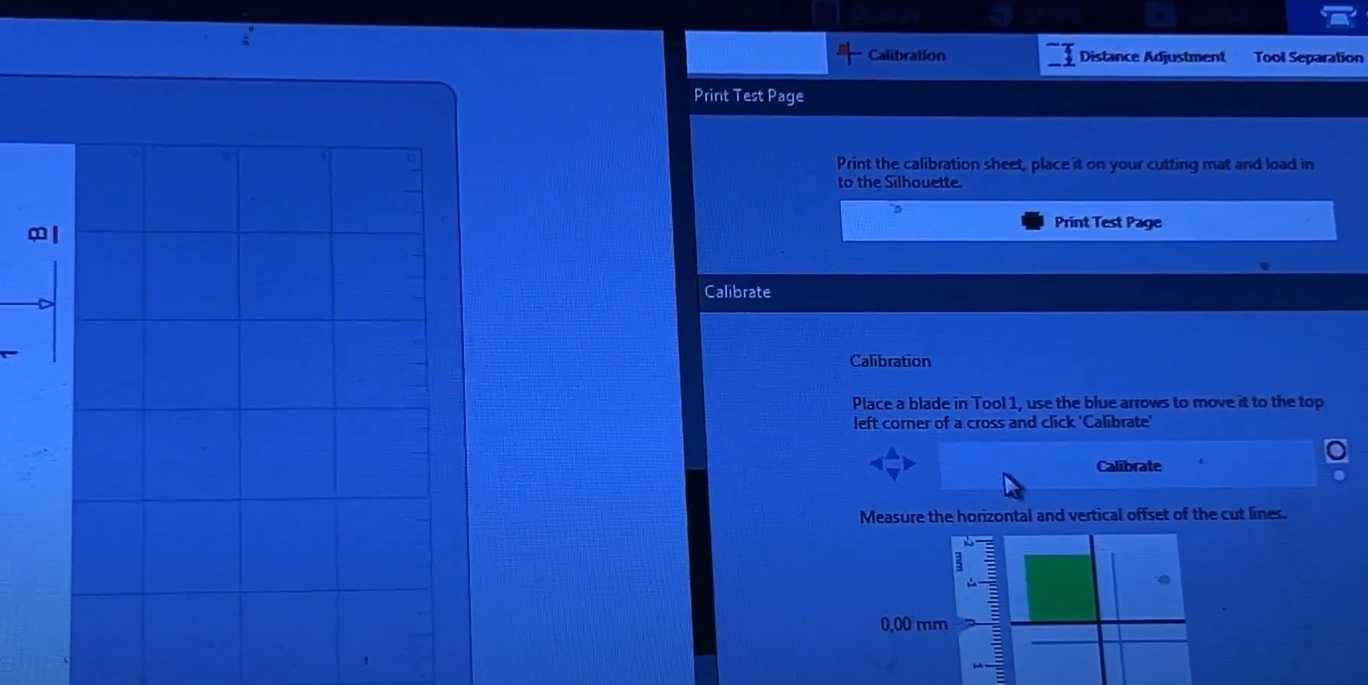
6. Now, insert the printed page into the Silhouette Cameo 4 machine.
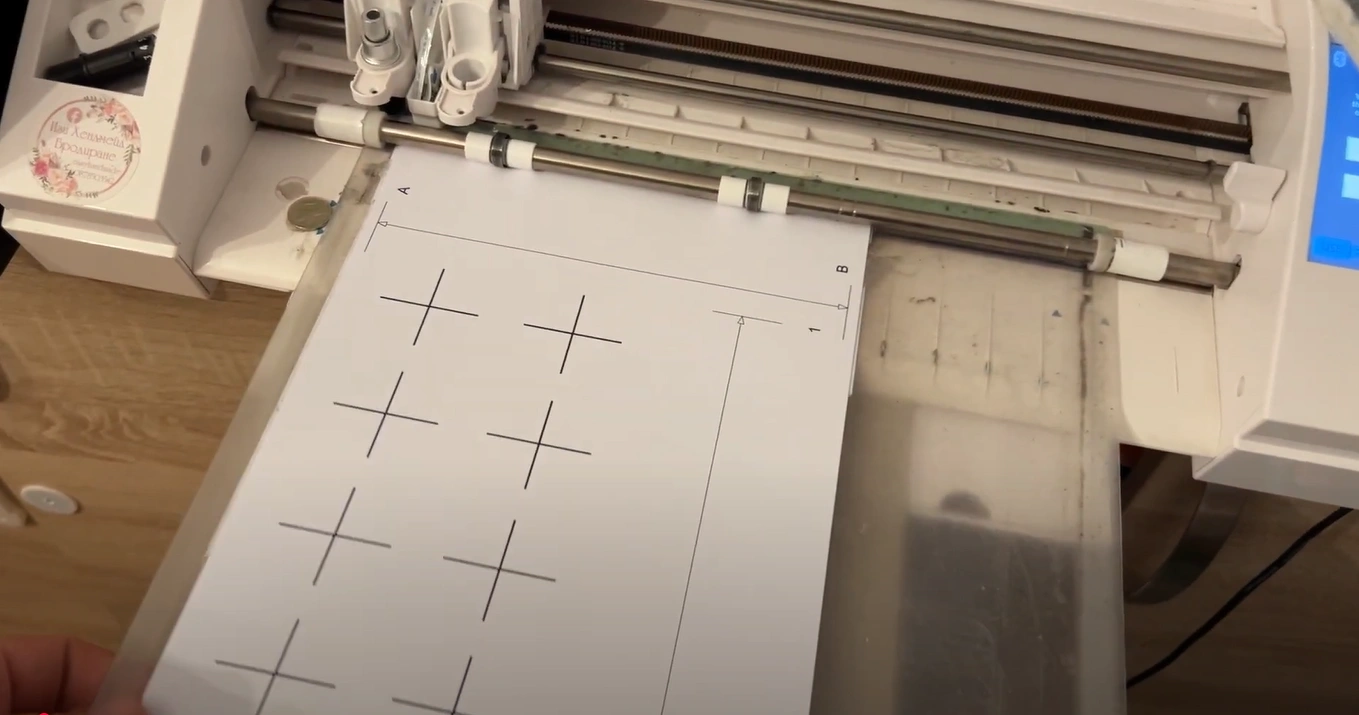
7. Use the arrow buttons on your machine to set the lines in Tool 1, as shown below.
![]()
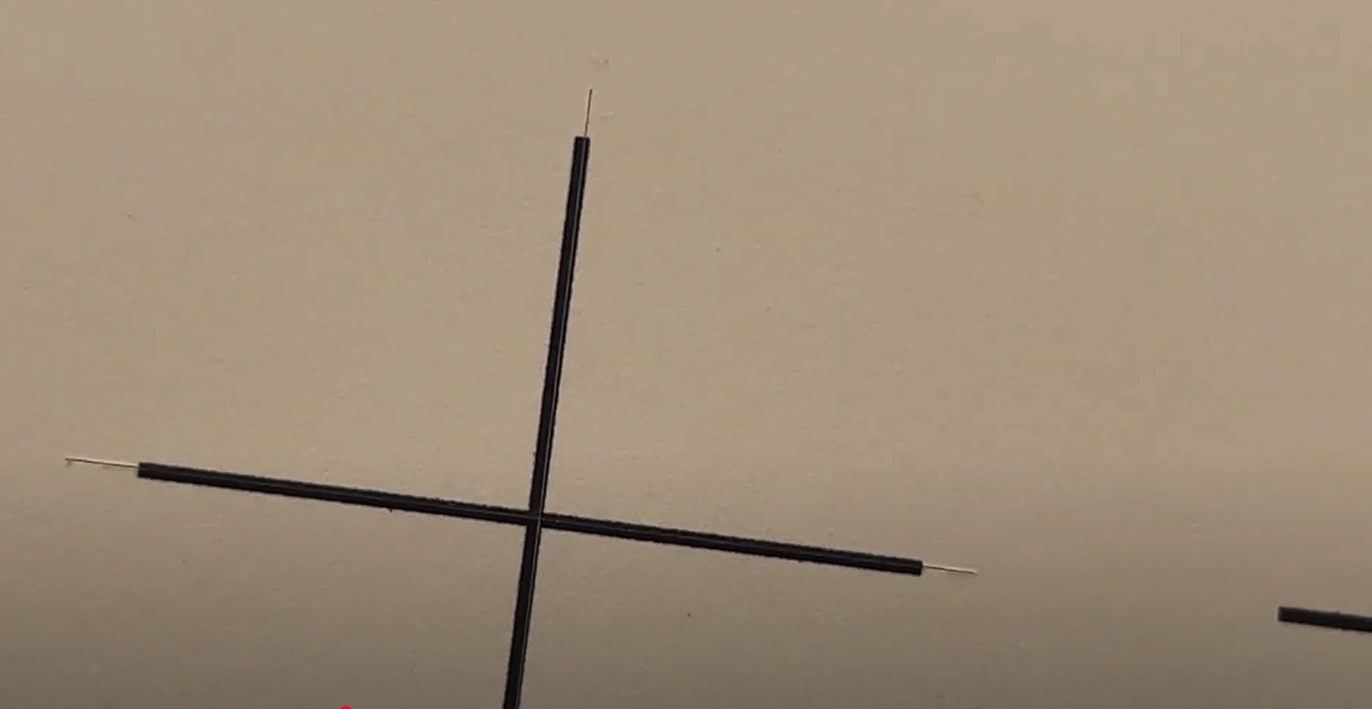
8. Move to your PC and select Calibrate to begin the process.
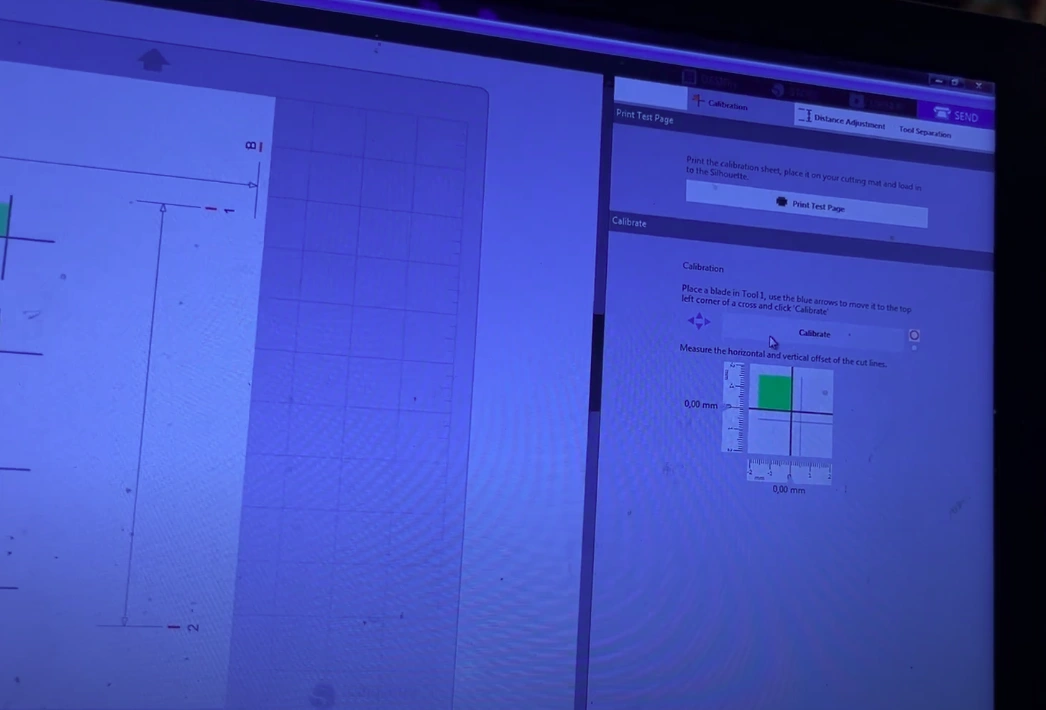
9. Wait for the cut process to complete, and then take out the sheet.
10. Check the cut lines; if the cut is not perfect, then click on the Distance Adjustment on the PC.
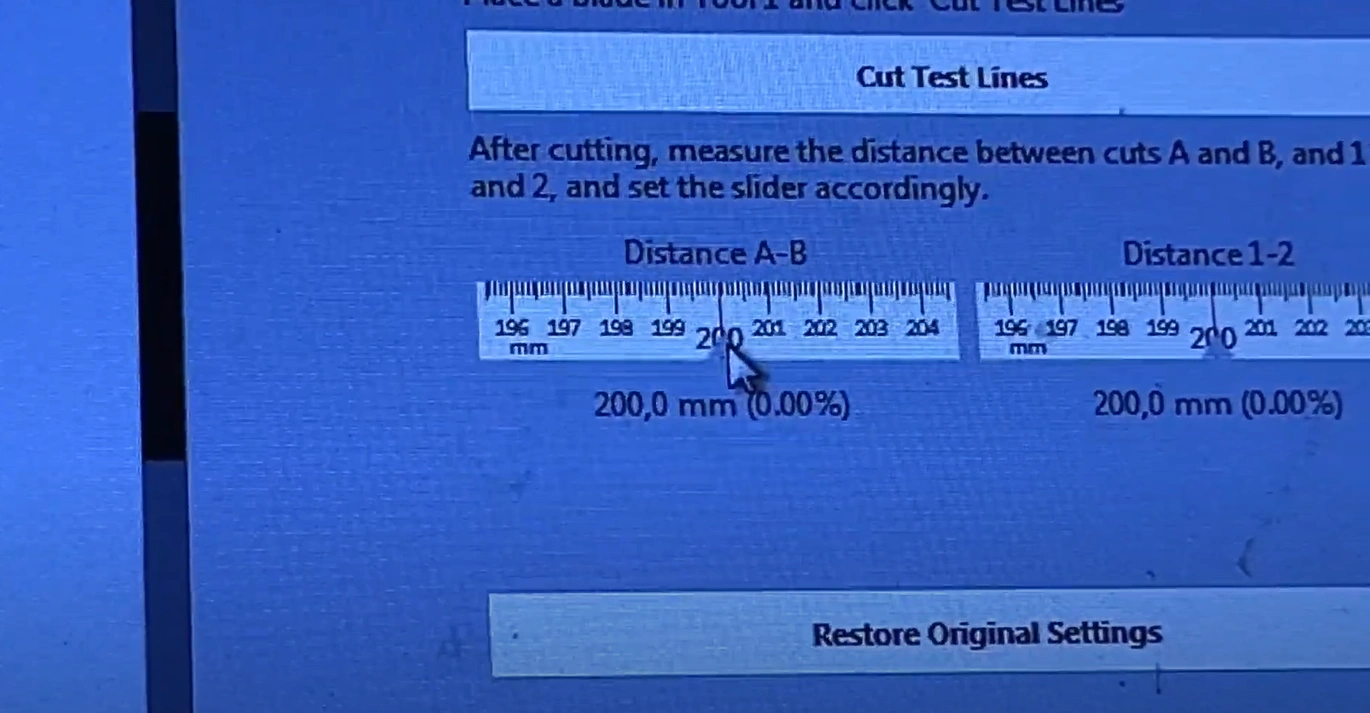
11. Insert the page again into your machine and select the Cut Test Lines option.
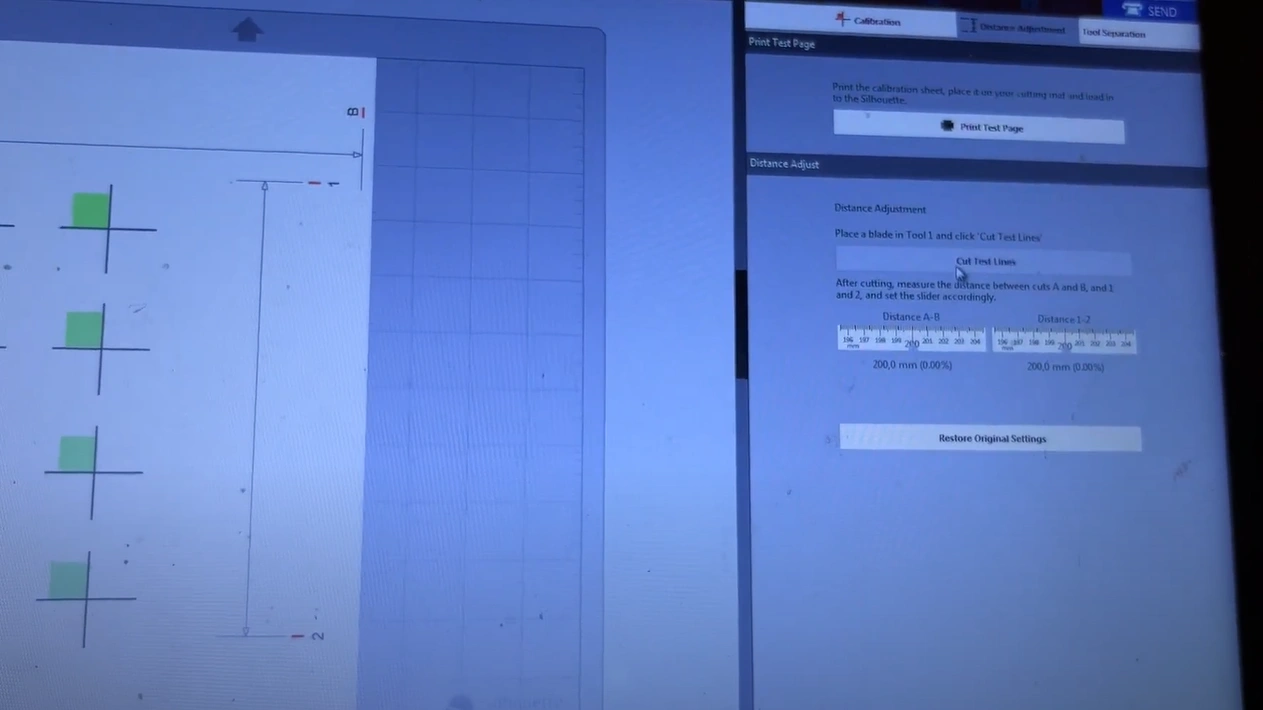
12. After that, take the paper out of the machine when the test cut is complete and measure it with a scale.
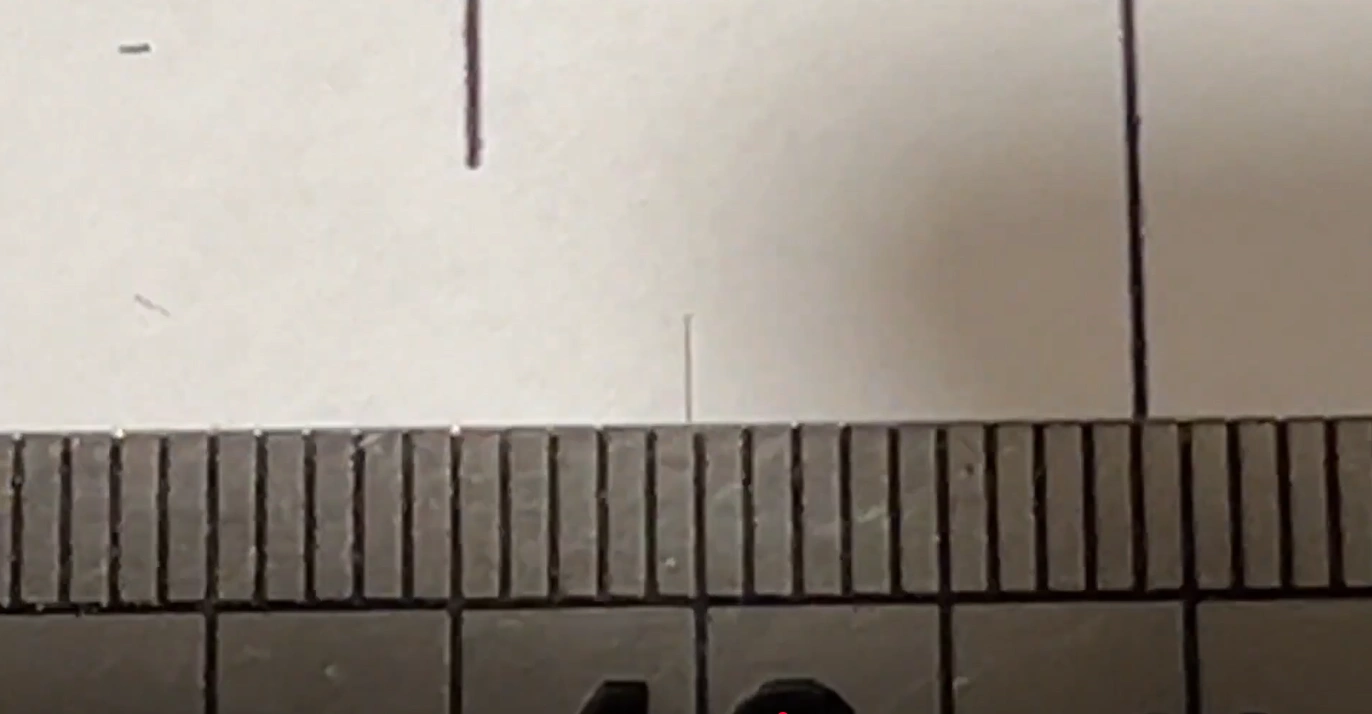
13. Next, select those measurements in the app.
14. Press Exit and click on the Test > Calibration option once again.
15. Insert the page into the machine upside down and select Calibrate.
16. Check the cut and make the necessary adjustments if necessary.
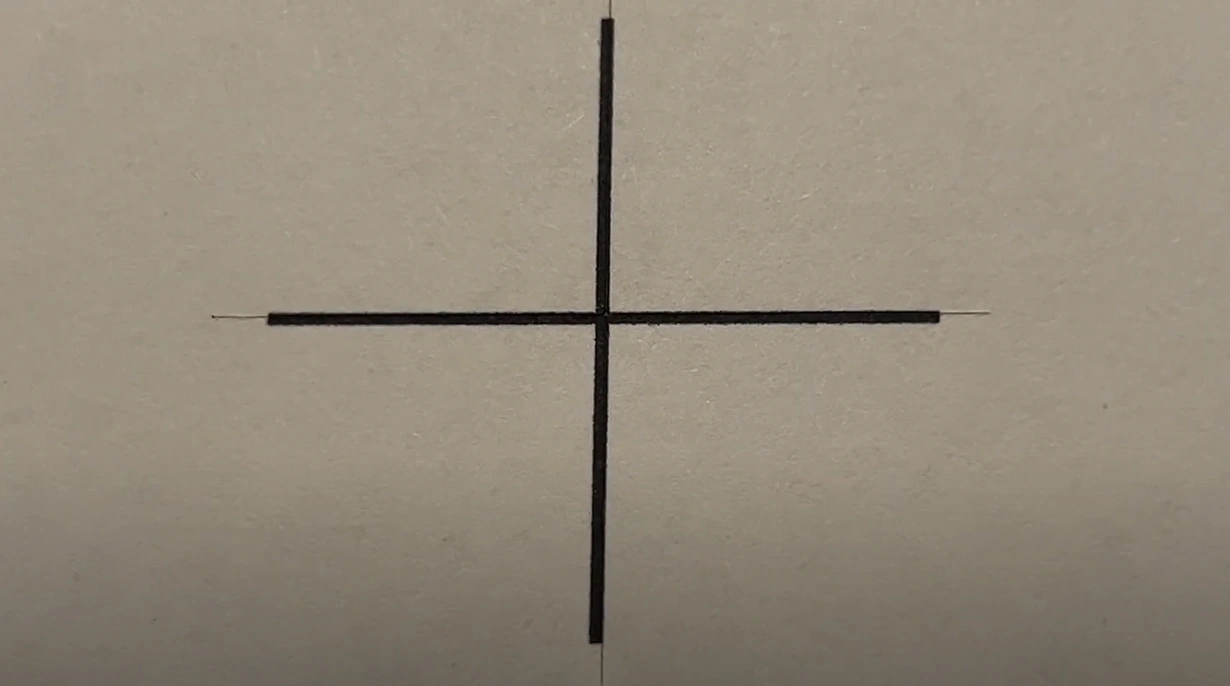
17. Follow the process until you see the perfect cut right in the middle of the lines.
Wrap Up
We hope your Silhouette Cameo 4 machine calibration is successful and the machine is cutting perfectly. You need to follow each step carefully to get the desired results and continue using your printer without facing any problems. You should calibrate your machine whenever cuts are inaccurate or when using a new material. Apart from that, you must look for more help from a professional expert to get real-time and effective guidance to complete the calibration process.


