
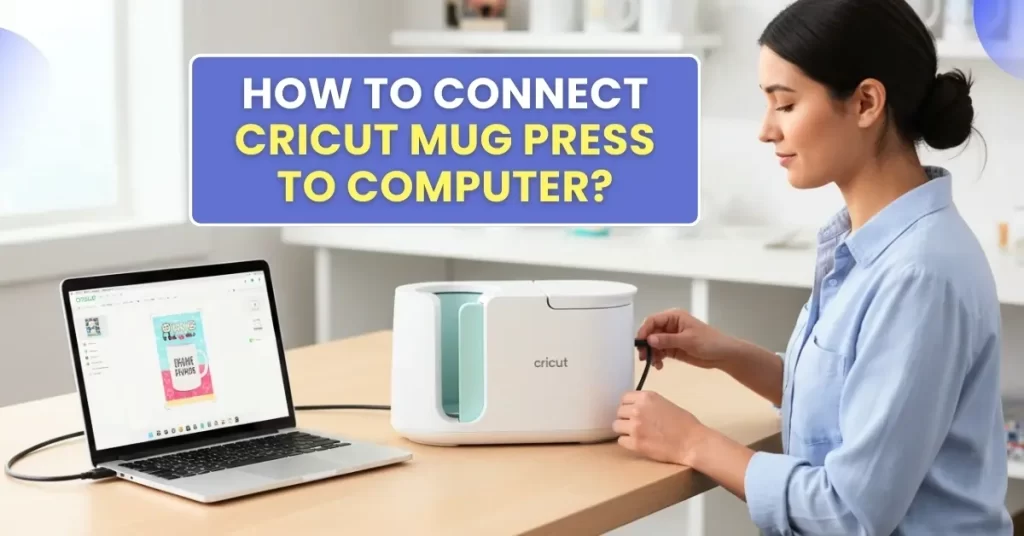
However, before you can start designing your mug, you need to understand some basic things. The first step is to connect the machine to a computer so it works properly.
If you are looking for the right instructions to get your Cricut Mug Press connected to a PC, you have arrived at the right place. Before we jump into the process, we want you to know what you will need during setup. Let’s start!
What Do You Need to Set Up the Cricut Mug Press?
Before you start setting up the machine, check if you have the following things with you:
- Cricut Mug Press itself
- A computer with Design Space installed
- USB cable
- Heat-resistant tape, protective sheets, a lint roller, and a StandardGrip mat
- A Cricut cutting machine, such as a Maker or Explore, to cut designs (if required)
- Protective gloves (optional)
Steps to Connect Cricut Mug Press to a Computer
Follow these given steps to get your Cricut Mug Press successfully connected to the computer:
Step 1: Turn on your Windows or Mac computer.
Step 2: Plug the USB cable into the machine and your computer.
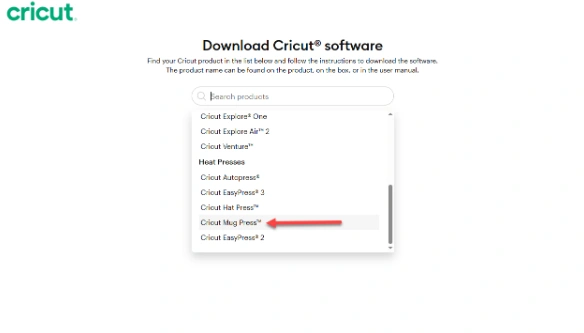
Step 3: Open your internet browser and go to cricut.com/setup.
Step 4: Once the page opens, enter your product name, or scroll down and select your product from the list.
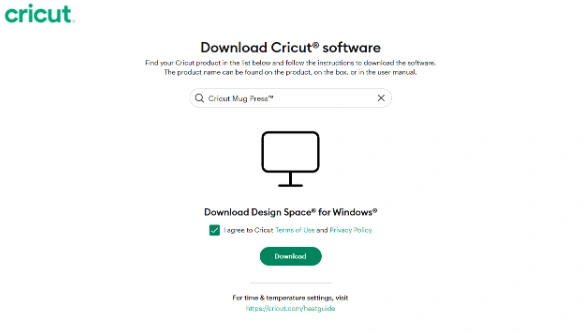
Step 5: Agree to the Cricut Terms of Use and Privacy Policy.
Step 6: If you already have a Cricut account, enter your username and password. If you don’t have an account, create one and proceed.
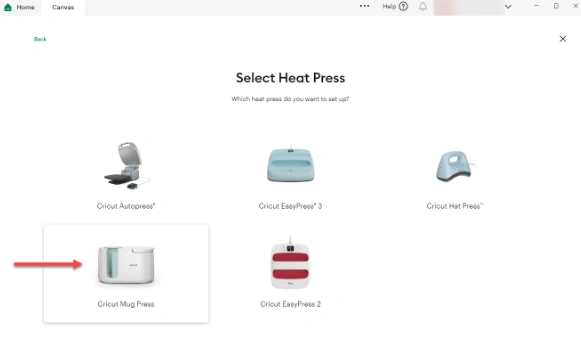
Step 7: You’ll now see a screen where you need to choose the “Set up a heat press” option.
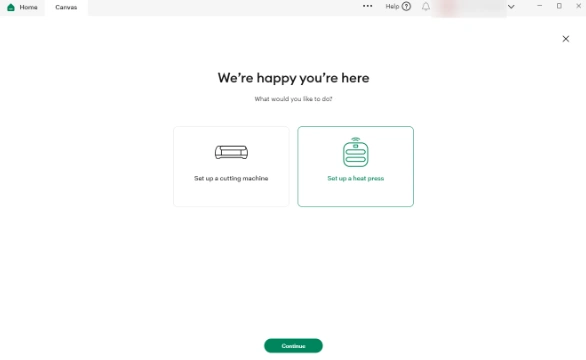
Step 8: Click Continue, then select Cricut Mug Press.
Step 9: Follow the on-screen instructions and connect your machine.
Step 10: Check for any firmware updates and finish the activation.
Step 11: Once it is done, click Get Started.
Final Thoughts
After completing the steps, your connection should be successful and ready for use. Now, gather the necessary supplies and continue with the steps discussed above. Make sure to use the Cricut Mug Press machine carefully while working on your iron-on projects. With proper handling and correct settings, you can expect smooth and flawless results every time you use it.


