
Have you purchased a new Cricut EasyPress but are unsure about its heat settings? An iron-on project demands accuracy and attention to detail, because otherwise, you may end up burning your material or applying too little heat. Have you tried an iron-on project? Then you may have several complaints, such as your vinyl not sticking after pressing or peeling off after a wash. Some users may also be switching from a regular iron to a Cricut EasyPress, which can create confusion and extra pressure.
As a beginner, using heat settings on your EasyPress may feel difficult; however, it becomes much simpler with the Cricut Heat Guide. It’s Cricut’s official app, designed to provide the exact temperature and time. In this guide, I’ll walk you through the basic Cricut EasyPress heat settings to make your iron-on projects easier and smoother.
Why Do Heat Settings Matter for Iron-On Projects?
Precise heat settings are critical for iron-on projects because they help the adhesive in heat transfer vinyl melt and activate properly. It prevents peeling and material damage. Every material has different heat tolerances, and customized heat settings for the specific material help ensure a durable, long-lasting project. You’ll notice better results with proper heat settings, and your worry about damaging your material will reduce once you learn them.
How to Use Cricut Heat Guide to Select the Right Settings?
The Cricut Heat Guide helps users select the right settings. But how can you use it? Here is a brief on using this app:
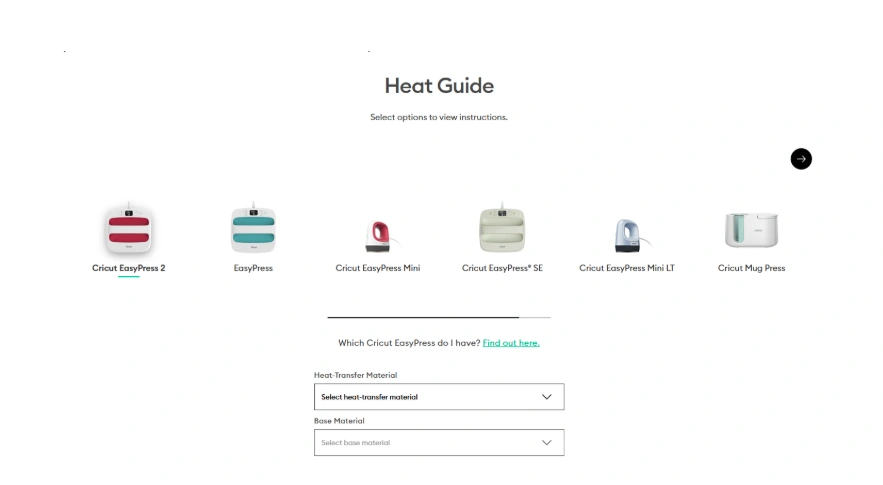
1. Open a web browser on your computer, and visit https://cricut.com/en/heatguide.
2. Select your machine model from the displayed options.
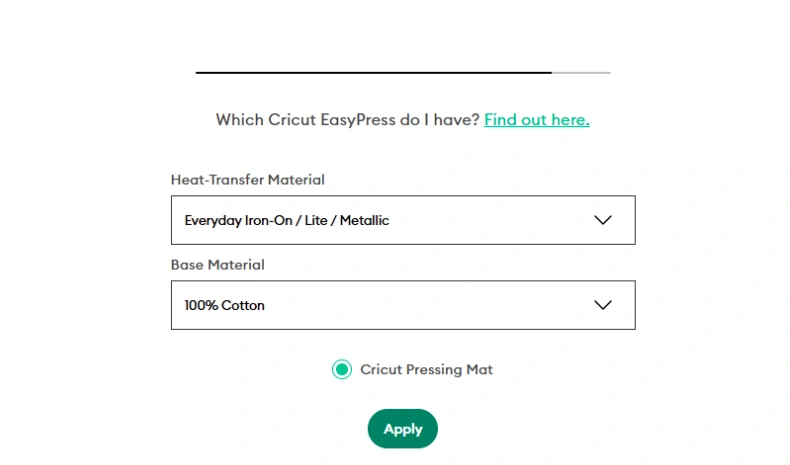
3. Select your heat transfer material (HTV, foil HTV, glitter HTV, etc.).
4. Then, select the base material on which you’re applying heat, such as fabric.
5. Click “Apply” to view the recommended temperature settings, along with the time and pressure.
6. Use the exact instructions to transfer heat to your material.
Quick Heat Settings Chart for Cricut EasyPress
Below is a quick chart of heat settings for common materials used with your EasyPress. Save this table to create long-lasting, professional iron-on projects.
| Material | Transfer type | Temperature | Time | Pressure | Peel Method |
| 100% Cotton | Standard HTV | 315°F (155°C) | 30 sec | Firm | Warm peel |
| Cotton/Poly Blend | Standard HTV | 315°F (155°C) | 30 sec | Firm | Warm peel |
| 100% Polyester | Standard HTV | 300°F (150°C) | 30 sec | Firm | Warm peel |
| Canvas | Standard HTV | 315°F (155°C) | 30 sec | Firm | Warm peel |
| Thick Cotton (Hoodies/Sweatshirts) | Standard HTV | 320°F (160°C) | 35–40 sec | Firm | Warm peel |
| 100% Cotton | Glitter HTV | 330°F (165°C) | 30 sec | Firm | Warm peel |
| Polyester | Glitter HTV | 315°F (155°C) | 30 sec | Firm | Warm peel |
| 100% Cotton | Foil HTV | 305°F (150°C) | 30 sec | Medium–Firm | Cool peel |
| Polyester | Foil HTV | 285–300°F (140–150°C) | 30 sec | Medium | Cool peel |
| Nylon | Standard HTV (Check Brand) | 280–300°F (138–150°C) | 25–30 sec | Medium | Warm peel |
| Spandex/Athletic Wear | Standard HTV | 300°F (150°C) | 30 sec | Firm | Warm peel |
| Polyester (Light Colors Only) | Infusible Ink | 385°F (195°C) | 40 sec | Firm | Cool peel |
| Polyester Coasters | Infusible Ink | 400°F (205°C) | 240 sec | Firm | Cool peel |
Points to remember while using heat settings:
- Use a heat-resistant surface, or a towel or mat, before pressing the material.
- When creating an iron-on project, preheat the fabric for 5–10 seconds to flatten the wrinkles and moisture.
- Always apply heat to the backside for 15 seconds after pressing the front.
- Wait for 24 hours before washing the HTV (heat transfer vinyl) projects.
How to Use Heat Settings to Press Material With Cricut EasyPress
After learning about the customized heat settings, let’s have a look at how to implement them. Since most users start with a basic cotton T-shirt or hoodie, I’ll explain the heat-pressing process step by step. I’m using a cotton T-shirt and heat transfer vinyl.
Step 1: Prepare Your T-shirt
To start, place your T-shirt on a heat-resistant surface, such as the Cricut EasyPress mat or an ironing board. This is to protect the surface from heat.
Step 2: Set the Heat Settings
Then, you need to set the right temperature and time for the material. Use the Cricut Heat Guide or the table above. The correct settings are 315°F for 30 seconds for a standard HTV. If you’re using foil HTV or glitter HTV, the settings are different. Your heat press will now preheat.
Step 3: Preheat Your T-shirt
Gently press the heat press on your T-shirt to prepare it for the final heat application. Do it for 5-10 seconds, and then you’re ready to press the design.
Step 4: Place the Design onto Shirt
After that, place your final design onto the shirt with the shiny side up, as it works as a heat-resistant carrier sheet. Many users make this mistake: placing the vinyl with the shiny side down.
Step 5: Press the Material
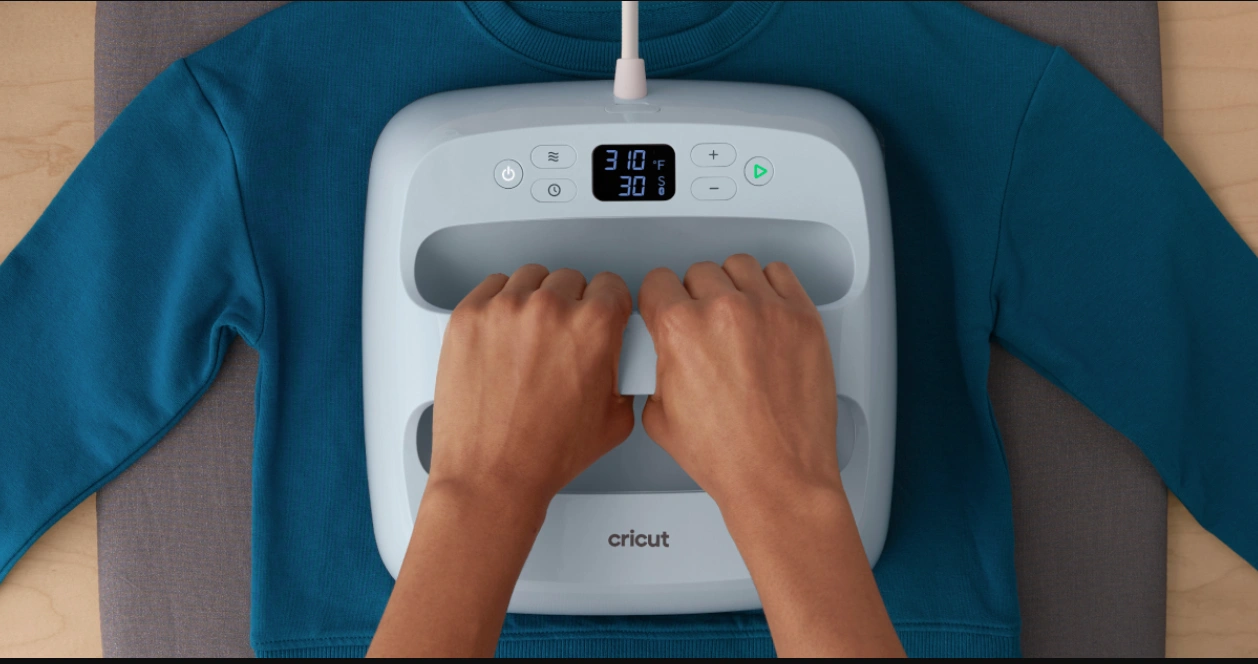
Press the Go button on the EasyPress machine with firm pressure for about 15-30 seconds. Next, flip the T-shirt inside out, and press the back of your design for 10-15 seconds.
Step 6: Peel off the Carrier Sheet
Now, you can peel off the carrier sheet from the vinyl when it’s slightly warm. Some materials require a cold peel, while others require a warm peel. Use the table above to confirm.
Also Read: Fix Cricut EasyPress E5 Code Error


