
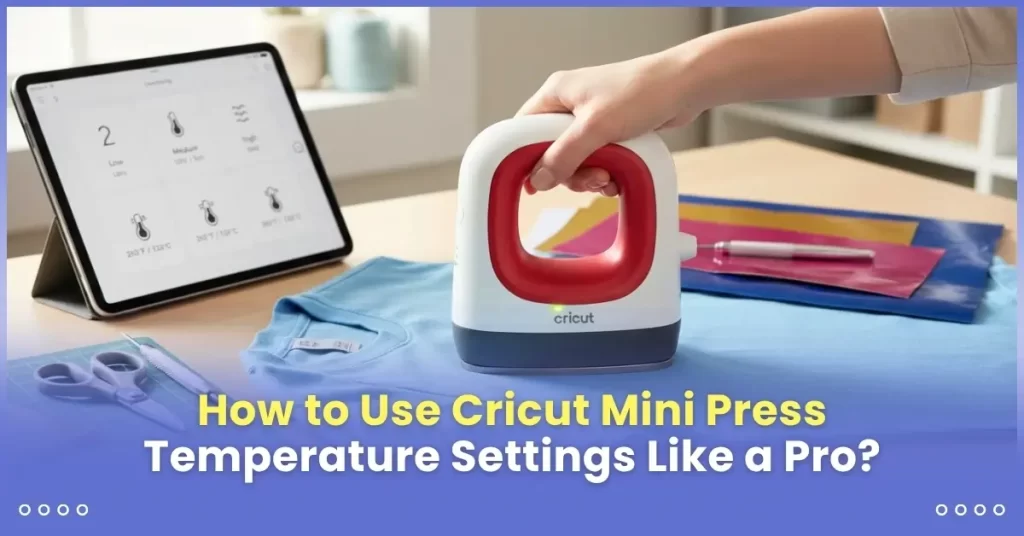
Have you started a project with your Cricut EasyPress Mini but are confused about its settings? It’s normal to feel that way as a beginner, especially when you are unsure which temperature to choose for your specific project and do not want to ruin your material by overheating. The Cricut EasyPress Mini has three heat settings, and you should know when to use each one for the best results. If you want accurate heat results, this guide provides a temperature chart you can use for future projects.
To make things easier, the Cricut Heat Guide is Cricut’s official online tool that suggests accurate heating settings. It is a beginner-friendly tool that tells you the right heat settings with custom instructions for different materials. In addition, we have included a basic chart of recommended heat settings for your EasyPress Mini to save you time.
Understanding the 3 Heat Levels of Cricut EasyPress Mini
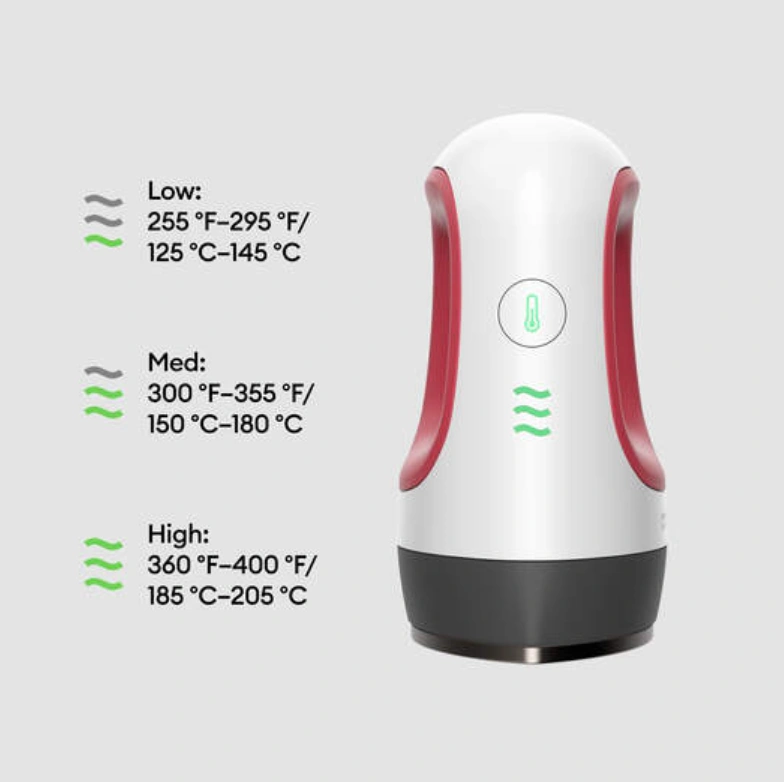
If it’s your first time using a Cricut EasyPress Mini, you are less likely to know about its three heat levels: low, medium, and high. Unlike the Cricut EasyPress, it does not have a temperature-range system. This machine has three preset heat levels, and you cannot manually adjust the exact temperature. Here is an explanation of all these levels.
- Low (125°C – 145°C / 255°F – 295°F): It is for sensitive base materials or heat-sensitive vinyl. It’s suitable for use on delicate items such as shoes.
- Medium (150°C – 180°C/ 300°F – 355°F): It’s ideal for base materials or heat-sensitive vinyls. It is suitable for most standard iron-on projects. Hence, it works well for most common materials.
- High (185°C – 205°C/ 360°F – 400°F): Heavy-duty base materials and infusible ink materials require a higher temperature than normal. High heat is best for thicker materials and Infusible Ink projects. However, it may not be suitable for large sublimation designs.
The EasyPress Mini does not display exact temperature numbers; instead, it blinks when heating up, and when the light turns solid green, it has reached the desired temperature.
Recommended Heat Settings for Cricut EasyPress Mini
As a beginner, all these heat settings may hold you back from creating something you love, as you may feel unsure about which one to choose. Therefore, here is a structured table with the recommended heat settings for your EasyPress Mini. You can check the settings for your specific material type and apply them accordingly.
Important Note: Temperatures are approximate and may vary slightly.
| Material Type | Heat Settings | Approx. Temperature | Pressing Time | What to Avoid |
| Cotton | Medium | ~300°F (150°C) | 10-15 seconds | Holding too long in one area |
| Canvas (Thick Cotton) | High | ~350°F (175°C) | 15-20 seconds | Overheating edges |
| Polyester | Low or Medium | 255–300°F | 8-12 seconds | Overheating the material |
| Poly Blends | Medium (Start Lower) | ~300°F | 10–12 seconds | Applying direct heat immediately |
| Heat Transfer Vinyl (HTV) | Medium (most brands) | ~300°F | 10–15 seconds | Peeling the carrier sheet too quickly |
| Infusible Ink | High | ~350°F | 15-20 seconds | Moving too quickly |
| Nylon | Low | ~255°F | 5–8 seconds | Applying direct heat |
| Silk | Low | ~255°F | 5-8 seconds | Holding the press for too long |
| Thin / Lightweight Fabrics | Low | ~255°F | 5-10 seconds | Skipping test press |
How to Use Cricut EasyPress Mini Heat Settings?
Once you’re clear about the three heating levels of the EasyPress Mini, it’s time to learn the steps involved in using this machine. Many beginners feel unsure about the heat settings at first, but with practice, it becomes easier to use, and I hope the same happens for you. However, I am not explaining one particular project; instead, I am giving you an overview of how to use the heat settings for any of your projects. Even if you are new to crafting, these steps will help you understand the basics.
Step 1: Preheat the EasyPress Mini
The first step is obvious: heating the machine. To get started, plug the machine into the wall outlet and press the power button on your machine. Set the desired heat level and wait for the machine to heat up. It heats up quickly due to its compact size. Within a minute, it will be fully heated.
Step 2: Check the Cricut Heat Guide
Here is how you can use Cricut’s official heat guide to set the right temperature settings:
- Search for Cricut Heat Guide on your browser.
- Select your machine model from the list.
- Select the base material and the heat transfer material and click on Apply.
- The heat guide will show you the exact settings for your iron-on project.
You’ll learn the required time to preheat and which setting to use: low, medium, or high. Also, how much pressure and movement is required?
Step 3: Select the Heat Level
Many users don’t know how to cycle through the levels. It’s very simple: press the power button on the machine. Press it again to cycle through the heat levels (low, medium, and high).
Indicator lights show the selected heat level. Press the power button again to turn off the machine. The light will stop flashing.
Step 4: Set a Timer
The EasyPress Mini has no timer. Hence, you need to use the timer on your phone to track the heating time. It’s very important to avoid ruining your iron-on project.
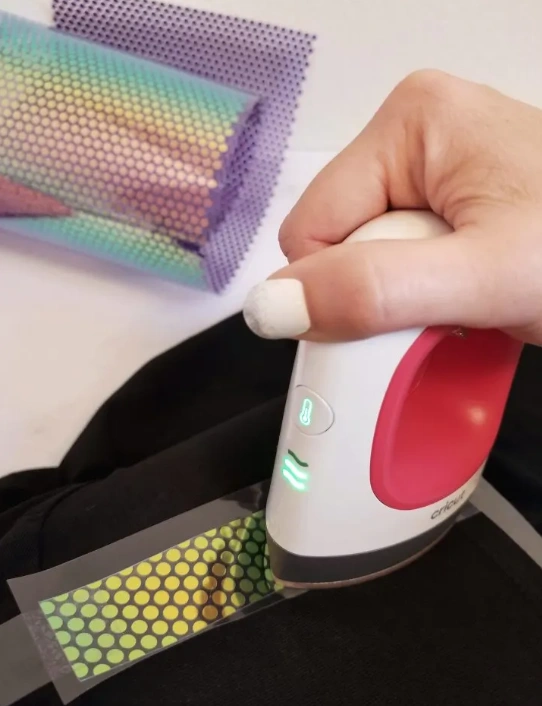
Step 5: Press the Material
The machine has a ceramic coating for seamless movement across different materials. You need to keep the pressure lighter and consistent. Use the recommended heat setting and move the machine slowly in small circular motions.


