
In addition, a worn-out or grimy mat can impact your cutting. If the Cricut machine delivers poor cuts, you may need to switch to a new mat.
Blade issues can be a significant concern if you rely heavily on your crafting machine. Let us look into how to resolve the issue of the Cricut blade not cutting properly.
Challenges in Fixing “Cricut Blade Not Cutting” Issue
You may face certain challenges and complications when fixing the “Cricut blade not cutting” issue. Here are a few common ones:
- Using the wrong blade type
- Incorrect blade installation
- Over-tightening the blade housing
- The mat is not sticky enough
- Firmware or software issues
Top 3 Methods for “Cricut Blade Not Cutting” Issue
Here are some quick methods for resolving the “Cricut blade not cutting” issue on your machine:
Method 1: Check Material Settings
Step 1: Make sure that the material settings you’ve selected in the Smart set dial match the settings in Design Space.
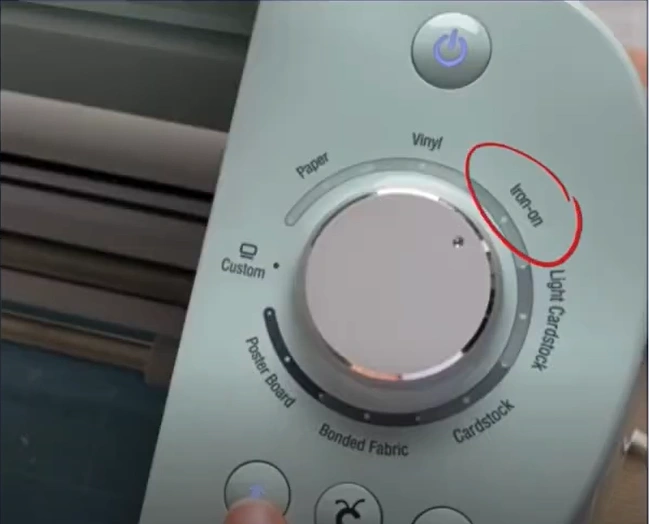
Step 2: If the dial is set to Custom, ensure you’ve selected the right material on Design Space.
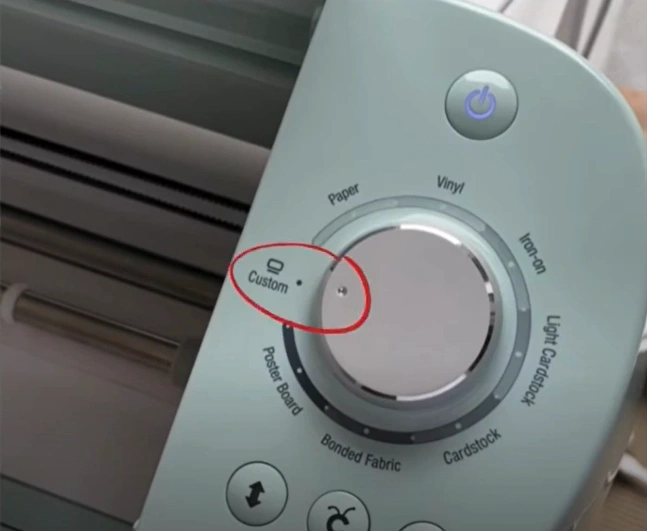
Step 3: Ensure the pressure settings are appropriate for your material and project.
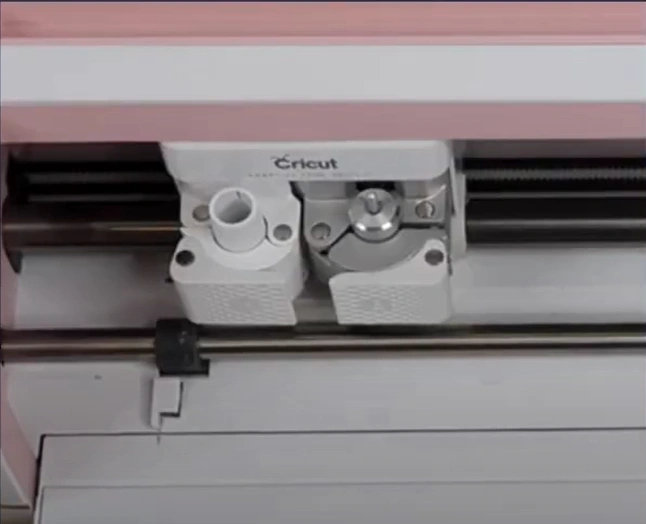
Method 2: Check the Blade
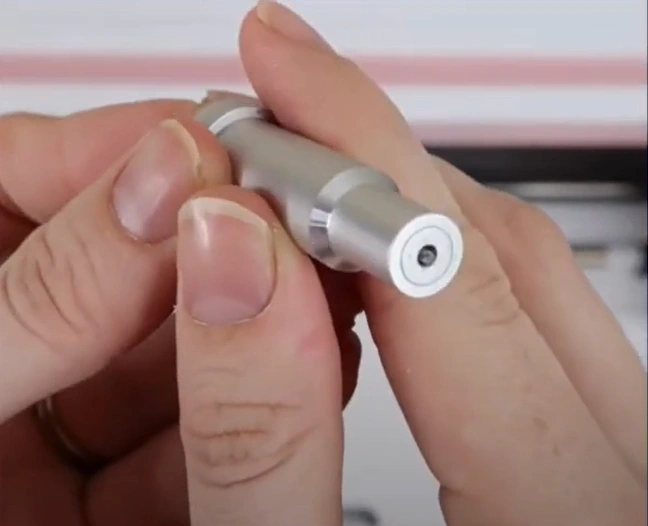
Step 1: Open the blade clamp and remove it from the housing.
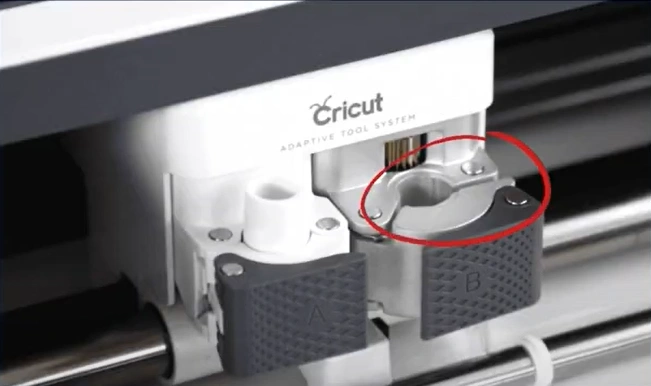
Step 2: Ensure that you’re using a Cricut brand blade.
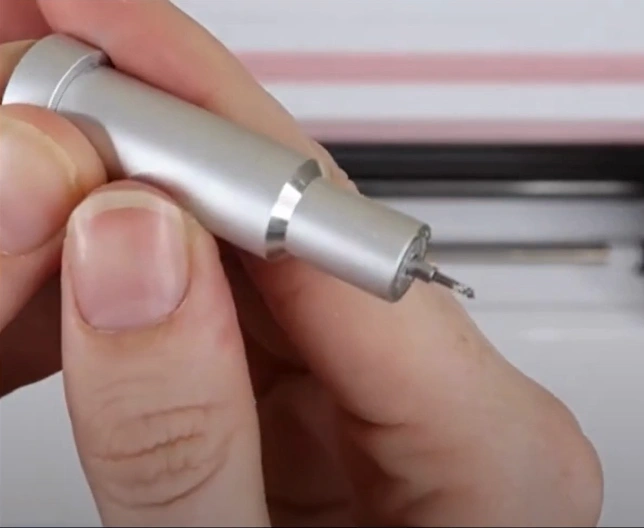
Step 3: Push the plunger on the top to expose the blade and check for any dust or debris. Clean it using a lint-free cloth or compressed air.
Step 4: Roll up a ball of aluminum foil, push the plunger, and stick the blade in a few times.
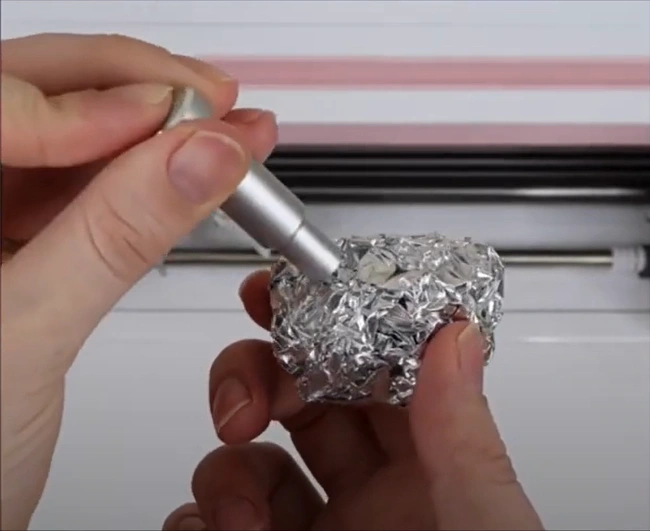
Step 5: This will clean the blade and sharpen it.
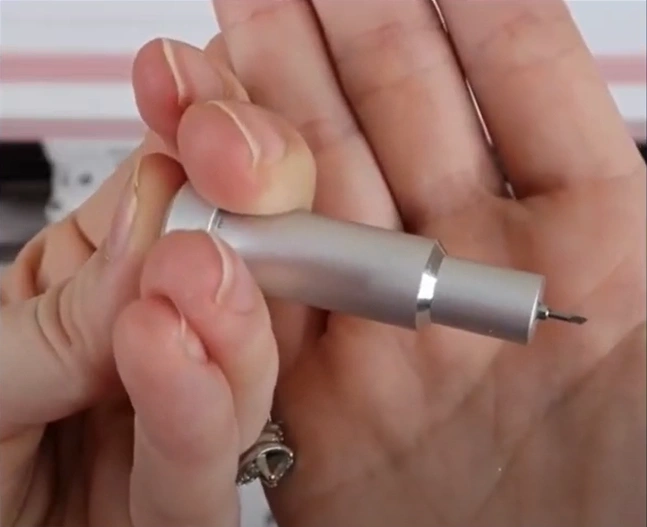
Step 6: Once done, insert the blade back into the housing.
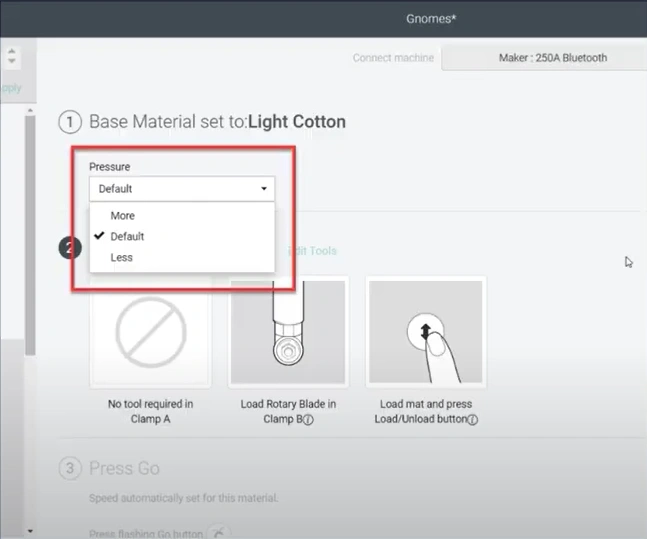
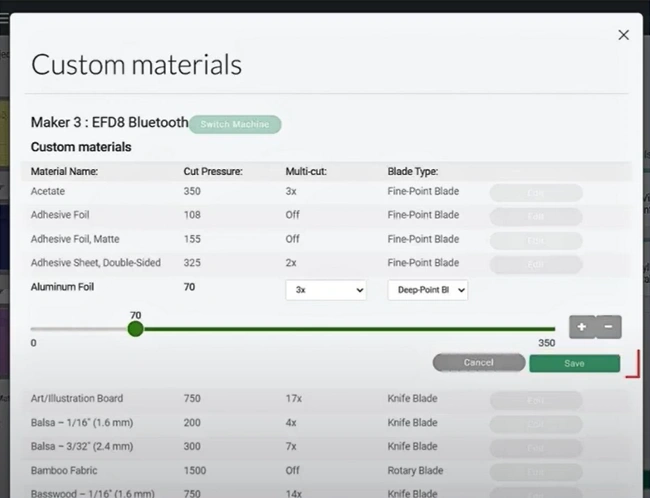
Method 3: Check Custom Material Settings Pressure
Step 1: Go to the Base Material Settings page and click Browse All Material.
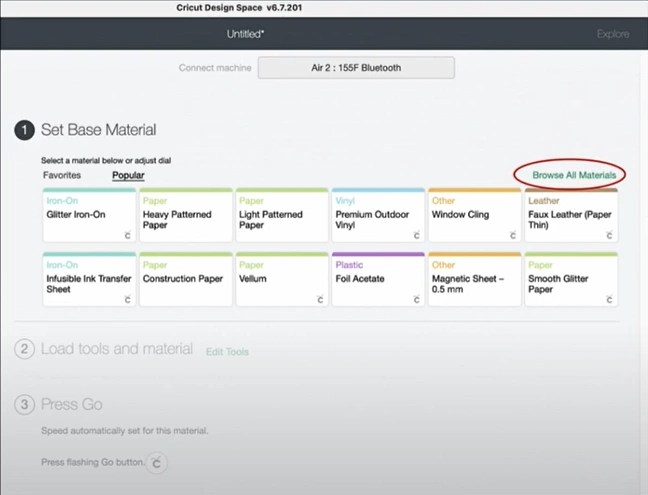
Step 2: Click Material Settings.
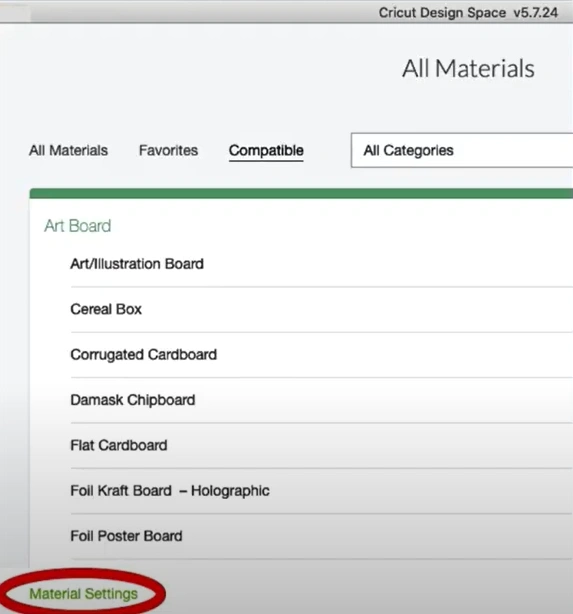
Step 3: Scroll and click Edit next to your cutting material.
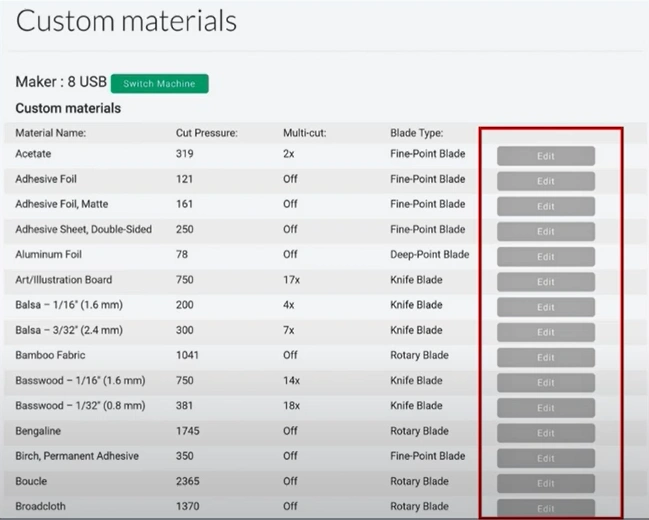
Step 4: Increase the pressure and click Save.
Closure
If your Cricut machine is not cutting as it used to, you must check the material settings. Check whether the material setting you have selected in Design Space matches the material on your mat. Inspect the blade and the housing for dust or debris. Clean them up and then perform a test cut. If this does not work, increase the machine pressure setting.


