Scalable Vector Graphics, or SVGs, are files that can be resized to any dimension without reducing quality. This makes them perfect for various project sizes and requirements.Unlike raster images like PNG or JPG, which are pixel-based, SVG files are vector-based, meaning they use mathematical paths for scalability. This means SVGs are easy to use within Cricut Design Space. It allows you to move, resize, and adjust individual design elements without losing quality.
Other than that, SVGs are natively compatible with the Design Space. As a result, these files can be uploaded and used without additional conversion steps.
In this write-up, we have outlined the complete “how to upload SVG in Cricut” process. Keep reading to learn the instructions. Let us first glance at the potential issues that may appear along the way.
Potential Issues When Uploading SVG Files in Cricut
When you try to upload an SVG in Cricut, you might face issues that may cause unsuccessful uploads. These problems can be:
- Pattern fills
- External dependencies
- Incomplete or distorted designs
- Incorrectly exported text
Steps to Upload an SVG File in Cricut Design Space
Take your crafting projects to another level. Follow these steps and upload your favorite SVG in Cricut:
Step 1: In the Cricut Design Space home screen, click on New Project.
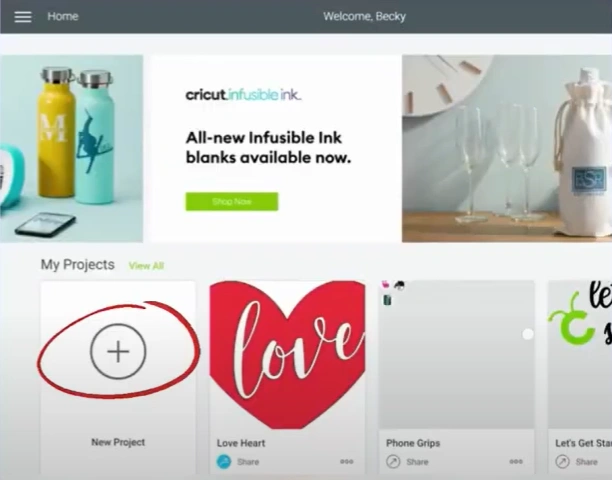
Step 2: Click on Upload tool in the design panel, then click on Upload Image.
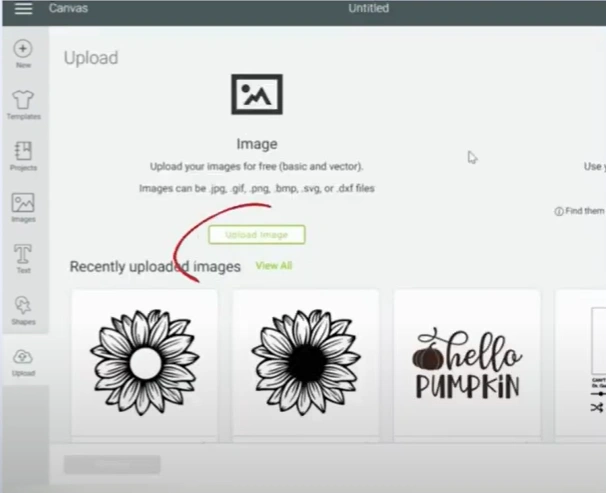
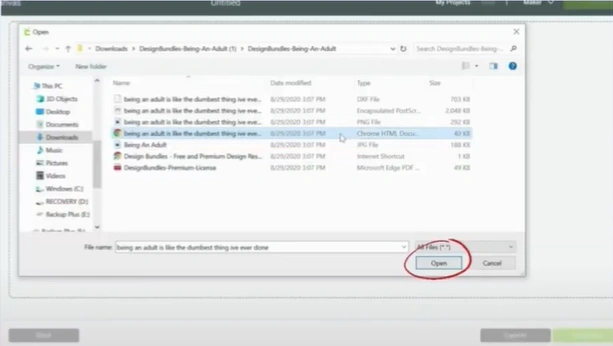
Step 3: Click Browse, then go to the file where the document is saved.
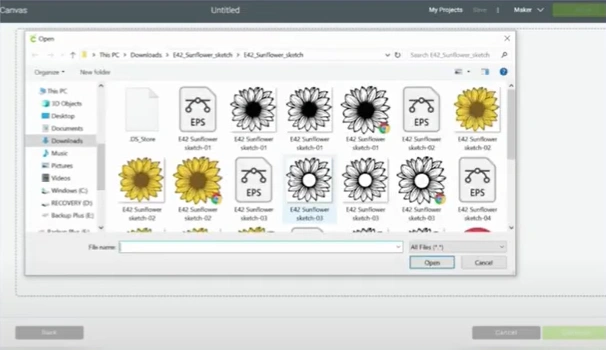
Step 4: Select the SVG file and click on Open, then click on Save.
Also Read :- How to Use Cricut Explore Air 2?
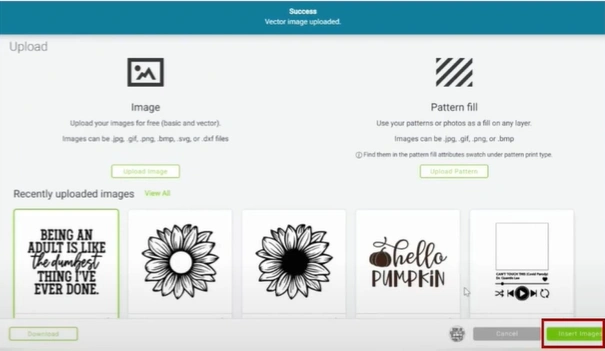
Step 5: Once the upload is successful, you’ll see the file Recently Uploaded Images section. Select it and click on Insert Images.
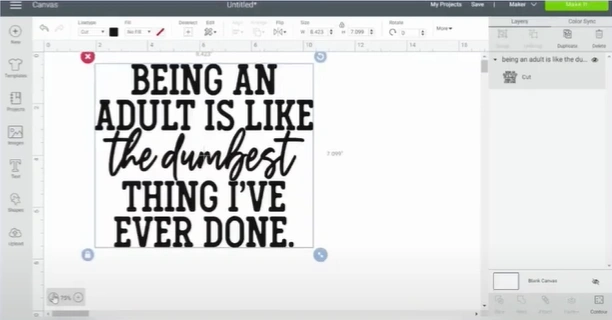
Step 6: The image will populate in the design canvas, then resize it to fit your project.
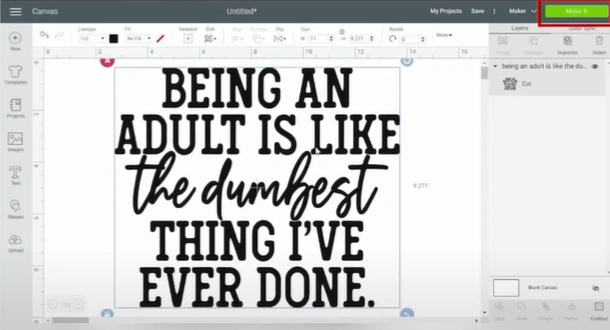
Step 7: When ready, click Make It to start cutting.
In a Nutshell
These are the essential steps you need to take to upload your favorite SVG in Cricut. Be mindful of the potential issues that may occur during the process.
Want to know how to upload multiple SVG in Cricut? Follow the same steps as discussed above. If you face any trouble while uploading, refer to Cricut’s official support page or consult an expert for immediate assistance.

