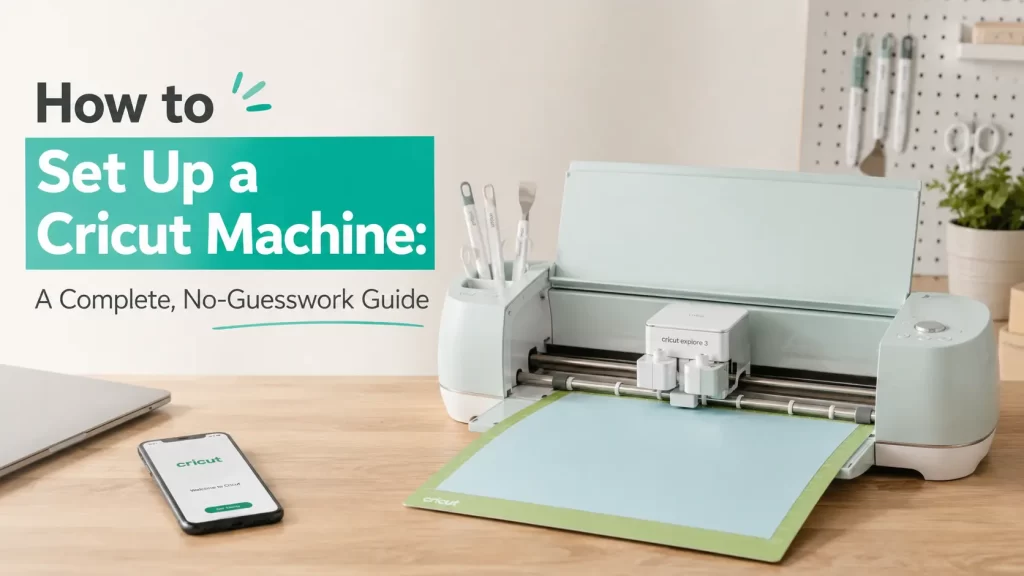
Setting up a Cricut comes down to five things: unbox and plug it in, download Cricut Design Space, create a Cricut ID, pair the machine by Bluetooth or USB, and run the test cut. Do those in order and you’ll go from sealed box to your first finished cut in about 15-20 minutes – most of that time is the software download, not the actual setup.
The confusing part isn’t the machine. It’s that Cricut splits the process across three different places (the box, the app, and a browser page called design.cricut.com/setup), and if you land on the wrong one first, you’ll waste time backing out of screens that don’t apply to you. I’ve set up an Explore Air 2, a Maker 3, and a Joy Xtra for different projects, and every single hiccup I ran into traced back to skipping a step rather than the machine itself misbehaving.
Here’s the process broken down so you don’t repeat those mistakes.
Before You Start: What You Actually Need
Three things trip people up before they even open the app:
- A laptop or desktop is strongly preferred over a phone or tablet. Design Space runs on mobile, but the cutting settings, font management, and image upload tools are noticeably more limited on the app version. If you only own a phone, you can still finish setup – you just won’t get the full toolset later.
- Chromebooks are not supported. This isn’t a minor limitation; Design Space simply won’t install correctly on ChromeOS, so if that’s your only device, you’ll need to borrow a Windows or Mac machine, or use the iOS/Android app instead.
- Bluetooth needs to be on, and your machine needs to stay within 10-15 feet of your device during pairing. Anything further and the machine either won’t show up in your Bluetooth list or the connection drops mid-setup.
One exception worth knowing: the Cricut Venture (Cricut’s large-format machine) currently only pairs with Windows or Mac over USB – no Bluetooth, no mobile setup. If that’s your machine, plan to sit at a computer for this.
Step-by-Step: Setting Up Your Cricut
Step 1: Unbox and Power On
Remove all the shipping tape and cardboard inserts from inside the machine – Cricut ships every unit with protective packaging wedged around the carriage and rollers, and leaving even one piece in place will jam your first cut. Place the machine on a flat, stable surface with enough clearance behind it for the mat to feed in and out freely; I learned this the hard way when I set mine six inches from a wall and the mat kept catching on the back edge.
Plug it into power. Machines with a physical power button (Explore and Maker series) need a press to turn on. The Joy and Joy Xtra have no power button at all – they power on automatically the moment you plug in the USB cable, which confuses a lot of first-time Joy owners who go looking for a switch that doesn’t exist.
Step 2: Download Cricut Design Space
Go to design.cricut.com/setup in a browser rather than searching for the app generically – this takes you straight to the setup flow instead of a generic app store listing. Enter your machine’s model when prompted, agree to the terms, and download the installer for your operating system.
On Windows, double-click the downloaded file and follow the installer prompts. On Mac, open the downloaded .dmg file and drag the Cricut icon into your Applications folder to install it. For mobile, search “Cricut Design Space” directly in the App Store or Google Play.
Skip ahead to Step 3 the moment the app opens – don’t close it and reopen it, since that sometimes resets the setup flow and makes you re-enter your machine model.
Step 3: Create Your Cricut ID
Sign in or create a free Cricut ID inside the app. This account isn’t optional cosmetic sign-up – it’s what links your machine’s serial number to your warranty and support history, and it’s required before Design Space will let you cut anything.
One thing nobody mentions in the official instructions: if you’ve already created a Cricut ID in the past, make sure to log in with those existing credentials instead of accidentally creating a new account, which can complicate your machine registration. If you’re not sure whether you already have an account, use the “forgot password” recovery option before making a second one.
Step 4: Register and Connect Your Machine
Inside Design Space, open the menu (three lines, top left) and select Machine Setup or New Machine Setup. Choose your machine model from the list, then follow the on-screen prompts. <cite index=”1-1″>This step is also what registers and activates your machine – you don’t need to do it separately.</cite>
Which connection method you’ll be offered depends on your machine:
- Bluetooth – turn on Bluetooth in your device settings, search for your machine model in the device list, and select it. If it asks for a PIN, try 0000 first. This is the only connection option for the Joy and Joy Xtra — neither has a data-capable USB port for setup (the port on the back of the Xtra is power-only, and the original Joy uses a barrel jack for power instead of USB).
- USB cable – available on the Explore and Maker series, plus required for the Venture. Plug the included cable directly from machine to computer. This is the more reliable option if you’re in a room with a lot of other Bluetooth devices competing for a connection (I’ve had pairing fail in a house with a smart TV, three phones, and a laptop all fighting for Bluetooth bandwidth in the same room — USB solved it instantly).
<cite index=”4-1″>Chromebooks aren’t supported for this process at all</cite>, which is worth double-checking before you get to this step and hit a wall. It also rules out USB pairing for a Joy or Joy Xtra owner troubleshooting a dropped connection. Bluetooth is the only path forward, so re-pairing from scratch is your fix, not switching cables.
Step 5: Run the Test Cut
Once connected, Design Space prompts you to load a mat and run a test cut, usually a small pre-loaded design using the sample cardstock or vinyl included in your box. <cite index=”7-1″>The test project looks different depending on which machine you bought</cite>, but the point is the same: confirming the blade, mat sensor, and Bluetooth/USB connection are all working together before you commit to your own project material.
You can skip this test cut, but I don’t recommend it. It’s the single fastest way to catch a dull blade, a misaligned mat, or a firmware issue before you waste $8 of specialty vinyl finding out the hard way.
Common Setup Problems (and What Actually Fixed Them)
Machine isn’t showing up in Bluetooth list. Nine times out of ten this is distance, not a broken machine. Move within 5 feet and retry. If that doesn’t work, forget the device in your Bluetooth settings entirely and re-pair from scratch rather than trying to reconnect to a “ghost” pairing.
Design Space says “no dial detected” or similar on Explore-series machines. Check that the smart dial (the round knob on the machine) is actually turned to Custom or matching the material. This is a physical dial setting, not a software toggle, and it’s easy to forget it needs to match what you selected on-screen.
Setup loop where it keeps asking you to select a machine. This usually means the app lost connection mid-setup. Close Design Space completely (not just minimize), unplug the USB or disconnect Bluetooth, and restart the whole app before retrying – restarting mid-flow without fully closing the app tends to repeat the same loop.
You already own a Cricut and are adding a second machine. You don’t need a new account. Go to Menu > New Machine Setup from inside your existing, signed-in Design Space account, and it’ll add the second machine to the same profile.
What Changes by Machine (Explore, Maker, Joy, Venture)
The setup steps above are identical across machines, but a few details shift:
| Machine | Power Source | Connection Type | Setup Quirk / Note |
|---|---|---|---|
| Joy / Joy Xtra | Auto-powers on when plugged in | Bluetooth only | No physical power button; the Xtra’s USB port is power-only, not for data |
| Explore Air 2 / Explore 3 | Physical power button | Bluetooth or USB | Has a smart dial that must match your on-screen material selection |
| Maker / Maker 3 | Physical power button | Bluetooth or USB | Supports the widest range of advanced blades and tools |
| Venture | Physical power button | USB only – <cite index=”1-1″>not compatible with mobile setup</cite> | Large-format machine; must be set up on a Windows or Mac computer |
What to Do Right After Setup Finishes
Once the test cut is done, resist the urge to jump straight into a Pinterest project. Two things will save you far more time later than they cost now:
- Check for a firmware update. Design Space usually prompts this automatically post-setup, but if it doesn’t, go to Menu > your machine name and check manually. Outdated firmware is behind a disproportionate number of “my Cricut won’t cut” forum posts.
- Calibrate your blade if you’re on a Maker or Explore. A quick calibration project (also found in the app’s built-in library) corrects for tiny blade-depth inconsistencies that cause torn edges on cardstock or incomplete cuts on vinyl. It takes about 5 minutes and most people never do it until they’ve already ruined a project.
From there, the next real skill to learn is how Design Space’s Canvas and mat preview work specifically understanding “Attach” versus “Group” (Attach keeps designs in their exact layout when cut; Group just selects multiple things at once). Mixing those two up is the single most common reason a first project comes out of the machine looking nothing like the on-screen preview.
Related Guides
Setup is just the starting point – here are a few follow-up guides worth bookmarking as you move from your first test cut into regular projects and troubleshooting:
- Cricut Explore Air 2, Cricut Maker 3, Cricut Joy Xtra, and Cricut Venture – model-specific pages if you want deeper detail beyond the comparison table above.
- Solve Cutting Machine Issues – a broader troubleshooting hub if the fixes in this guide don’t resolve your specific problem.
- How to Use Cricut Mini Press Temperature Settings Like a Pro? and Best Cricut EasyPress Heat Settings for All Materials – useful once you move from cutting into heat transfer vinyl projects.
- How to Use the Cricut Mug Press? and Cricut Mug Press Blinking Orange – How to Fix? – if your setup includes a press alongside the cutting machine.
- How to Fix Cricut EasyPress E5 Code Error? — a common error code worth knowing about before it shows up mid-project.
Yes, for the initial download and account creation. After that, the machine itself connects to your computer or phone via Bluetooth or USB, not directly to Wi-Fi.
Yes, using the iOS or Android Design Space app – except for the Venture, which requires a Windows or Mac computer.
No. Setup, registration, and your first test cut are all free. The subscription only affects access to premium fonts, images, and ready-made projects afterward.
This almost always means the Bluetooth or USB connection dropped mid-process. Fully close the app, reconnect the cable or Bluetooth pairing, and reopen Design Space rather than retrying within the same session.