

Setting up the Cameo 4 Pro is simple; just follow a few basic steps, and the setup will be complete. The question of how to do the setup may be the only thing running through your mind at the moment. For that reason, we have outlined all the steps clearly here, so read on to learn more. Before you proceed to the setup steps, take a moment to review the common mistakes you should avoid during the process.
Mistakes to Avoid When Setting up Silhouette Cameo 4 Pro
Setting up the Silhouette Cameo 4 Pro is not too complex. But there are certain mistakes that many users make along the way. Let’s check them out:
- Not adjusting the rollers correctly
- Skipping the required firmware update
- Selecting the wrong cut settings
- Using a dirty, worn mat
- Loading the mat or material incorrectly
Common Issues That May Arise During the Setup Process
These are some common issues that might occur when setting up the Silhouette Cameo 4 Pro and hinder the process:
- Connection problems
- Mat or material feeding incorrectly
- Blade or tool holder problems
- Calibration and cutting errors
- Noisy operation or jamming
Steps to Setup a Silhouette Cameo 4 Pro
Here is a step-by-step process on how to set up your Silhouette Cameo 4 Pro the right way:
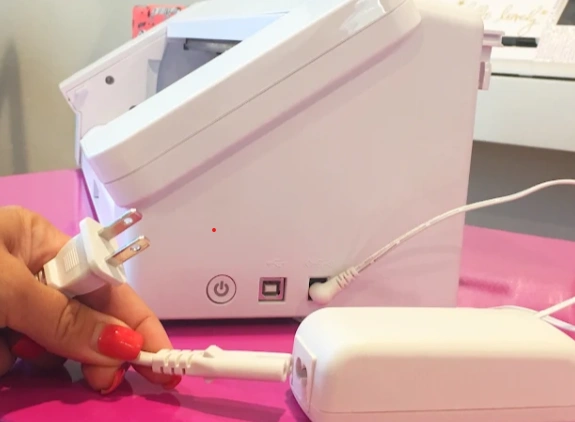
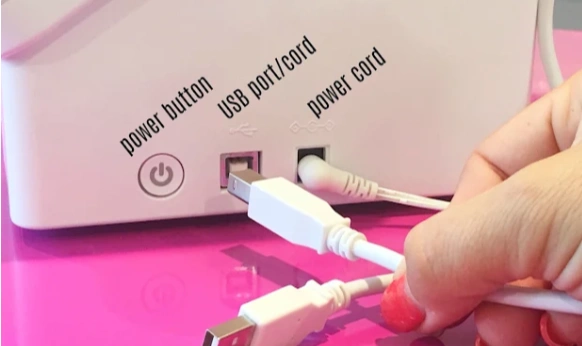
Power and PC Connection
Step 1: Plug the power adapter into the machine and then into a wall outlet.
Step 2: Use the included USB cable to connect the crafting machine to your computer.
Alternatively, you can connect via Bluetooth by pressing the Bluetooth button on the machine and pairing it with your computer.
Download and Install Silhouette Studio
Step 1: Visit the official Silhouette website – silhouetteamerica.com.

Step 2: Navigate to the Software section.
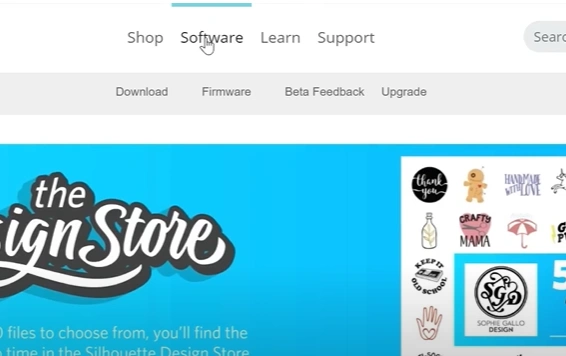
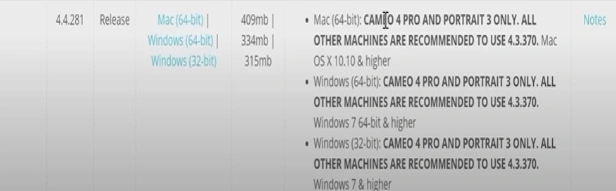
Step 3: Select Download to download the latest version of Silhouette Studio.

Step 4: Install the app on your computer by following the on-screen prompts.
Connect Cameo 4 Pro in Silhouette Studio
Step 1: Open the Silhouette Studio on your computer.
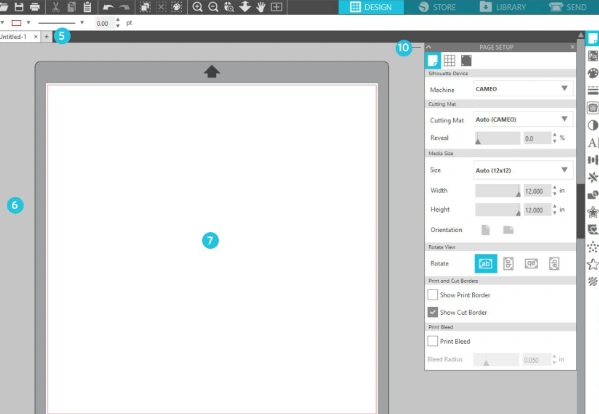
Step 2: In Silhouette Studio, locate the machine icon and click the Send tab in the top-right corner of the screen.
![]()
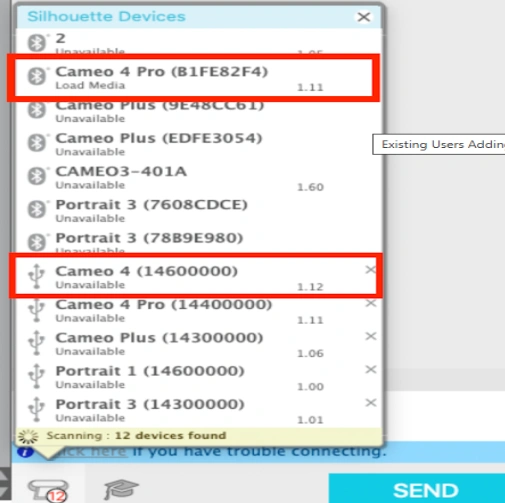
Step 3: The software will start detecting your machine. If you are using a USB connection, your Cameo 4 Pro’s name will appear automatically.
Step 4: If using Bluetooth, ensure that Bluetooth is activated on both your PC and the crafting machine.
Step 5: To turn on Bluetooth, tap the Bluetooth icon on the machine’s display, and it will turn blue.
![]()
Step 6: On the Send panel, select the Bluetooth option for your machine.
Step 7: Follow the on-screen steps to finalize your connection and complete the setup process for your Silhouette machine.
Also Read:-How to Calibrate Silhouette Cameo 4?
Wrap Up
Here, we wrap up the complete process for setting up the Silhouette Cameo 4 Pro. Start by checking the power cable and connecting the USB cable included in the packaging. Then, download and install the Silhouette Studio software and open it on your computer. Locate the machine icon and click the Send button in the top-right corner. When connected via USB, Silhouette Studio will automatically detect your machine. For a wireless setup, make sure you have turned on Bluetooth on both your computer and the Cameo 4 Pro.
To ensure smooth cutting, avoid skipping the firmware update, keep your mat clean, and select the correct cut settings right from the beginning.


