

Not tech-savvy? Don’t worry, after connecting your Cricut Explore Air 2 to your Mac via Bluetooth, you’ll feel like a pro.
A clean and organized setup helps you focus better and be more creative. But how do you connect your Cricut to Bluetooth? Let’s learn how to connect the Cricut Explore Air 2 to a Bluetooth device on a Mac.
Challenges When Connecting Cricut Explore Air 2 to Bluetooth on Mac
Connecting your Explore Air 2 to Bluetooth is a straightforward process. But, there may be chances of potential problems occurring, such as:
- The Cricut machine is too far
- Bluetooth is not enabled
- Outdated Bluetooth driver
- The machine is already connected to another device
- Design Space is not detecting the machine
What You Should Know Before Connecting Your Cricut to Bluetooth
Before you start connecting your Explore Air 2 to Bluetooth on your Mac device, you need to know certain things for a seamless connection:
- Verify that your Mac has a built-in Bluetooth feature. To do this, open the Apple menu, navigate to System Settings, and then locate the Bluetooth option.
- The Explore Air 2 comes with built-in Bluetooth. If you are using the previous version (Explore One), you may need to use an external Bluetooth adapter.
- Check if your Mac is up to date with the latest version. If not, check for the newest update and apply it; otherwise, compatibility issues may occur.
- Make sure to unpair or disconnect your machine from other devices. It should not be paired with your phone or another computer; otherwise, the Bluetooth connection will not be established.
- Make sure the Design Space application is installed, as it’s required to use your machine on a Mac.
Steps to Connect Cricut Explore Air 2 to Bluetooth on a Mac
Follow the steps below to connect your Cricut machine to your Mac computer via Bluetooth:
Step 1: First, ensure that the machine is on and is within 10 to 15 feet of your Mac.
Step 2: Go to System Preferences on your computer.
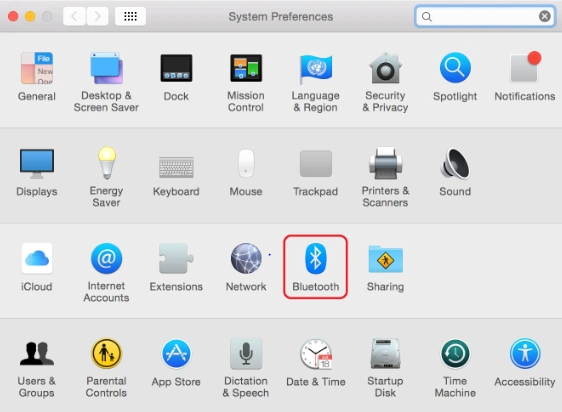
Step 3: Open Bluetooth settings and turn it on if it’s not already enabled.
Step 4: Now, select your Cricut model from the list of devices and click on the “Pair” option.
Step 5: If prompted for a PIN, enter 0000 to complete the pairing process.
Also Read:- How to Change Blade on Cricut Explore Air 2?
Conclusion
Follow the instructions discussed and see how easy it is to connect your Cricut Explore Air 2 to Bluetooth on a Mac. After connecting via Bluetooth, you can start using your machine with Design Space to create custom designs, intricate cuts, and more. The wireless connection lets you design and cut from anywhere. Be sure to keep your Mac within range of the machine to avoid disconnection.
If your Mac can’t detect the Bluetooth device, don’t worry. Try restarting your Mac or turning Bluetooth off and on again.


