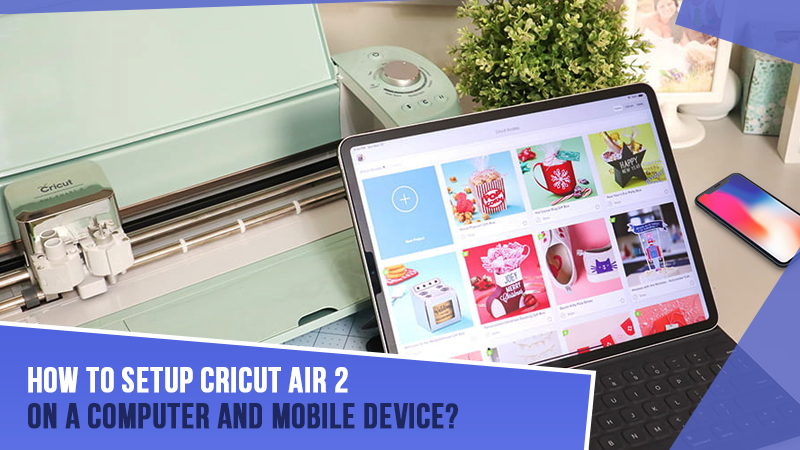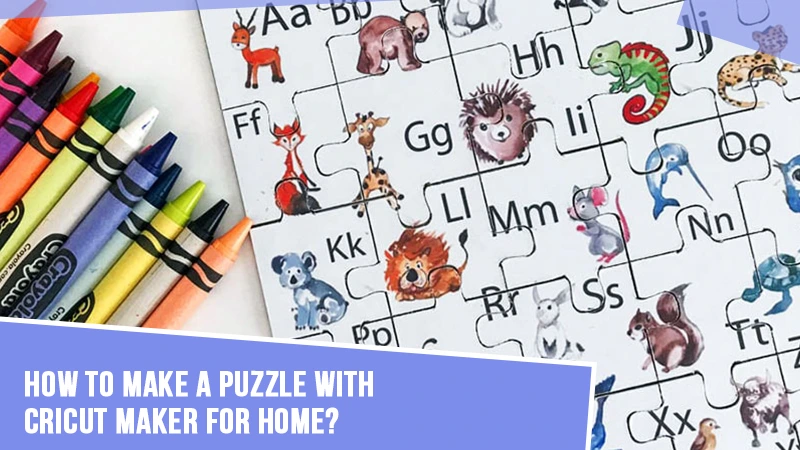
How to Make a Puzzle With Cricut Maker for Home?
Puzzles are excellent gift ideas for children and perfect home decor. The Cricut Maker machine lets you get started with fantastic puzzle projects and surprise your loved ones. I love creating these fun projects. Since these are super easy, I use my spare time making them. Also, I have created several custom puzzles and shared them as gifts. And you know what? I received huge praise from all the recipients. With all that said, I am here to help you learn how to make a puzzle with Cricut Maker.
This post provides an easy and efficient process for making a DIY name. It includes all the needed steps. Therefore, dive deep into it and create something extraordinary with your Cricut Maker machine
Let’s start the process with the needed supplies and materials.
Essential Tools and Supplies for Creating a Name Puzzle
Have you decided to surprise everyone with a DIY puzzle project? Start making the name puzzle with the supplies you need. Here is a list of a few of them.
- 2 mm chipboard
- Knife blade
- Cricut Maker machine
- 1/16″ Basswood sheets
- Cricut StrongGrip mat
- Masking tape
- Rags
- Paintbrushes
- American color stains of various colors.
- DAP Rapidfuse wood adhesive
How to Make a Puzzle With Cricut Maker: 3 Basic Steps
A Cricut Maker machine allows crafters to make custom name puzzles using Cricut puzzle material. If you are excited about making one, discover the key steps below. They include designing the puzzle, cutting out names, assembling it, and more.
Step 1: Designing a Name Puzzle in the Cricut Software
The first step in making a puzzle is designing it in Design Space. Below is a breakdown of the process in simple steps. Go through them and execute them promptly for nice designs.
- First, go to the Image tab in the Cricut Design Space.
- Now, select the rectangle piece and add the design to your Canvas.
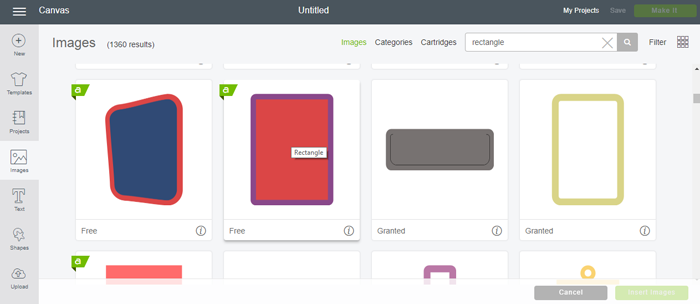
- Then, you will see that the rectangle has two pieces.
- Following this, ungroup them and make sure to delete the one that has no rounded corners.
- Further, remember to turn the rectangle as shown in the picture.
- After that, go to the Text and enter the text you want.
- Select the font type that seems apt to you.
- Next, pick up your text and tap the eye icon. You can find it next to the black text version.
- Now, move the font to the rectangle and ensure it fits perfectly.
- Thereafter, design your puzzle in any size you want.
- Afterward, ungroup the text so that it comes out in two pieces.
- After that, move the top that is a gray letter off.
- Then, make a copy of the rectangle.
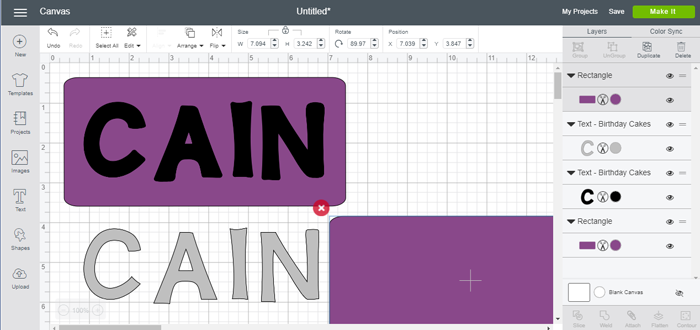
- Next, select the name at the top of the first rectangle, plus that rectangle, and tap on the slice.
- Turn your second rectangle to a different color.
- Duplicate your name and then move to the Menu option.
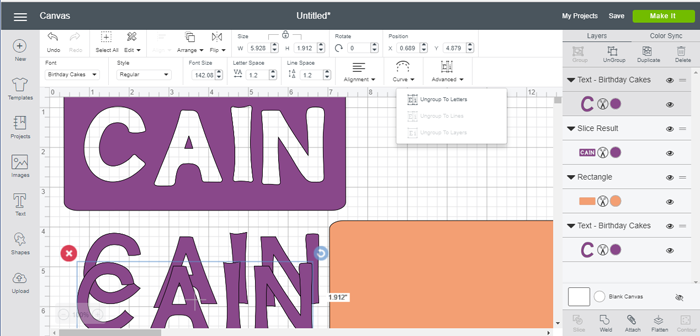
- Ungroup names into letters, then.
- Pick out the rectangle with the name and hit on Contour.
- Finally, press X on the screen to remove unwanted things from the cut
After learning how to make a puzzle with Cricut Maker, you will return with a wonderful name puzzle design. However, the process still needs to be completed. You must perform the additional two key steps while working with Cricut.
Step 2: Cutting Out the Name Puzzle
After you design the name puzzle, the next step is to cut it out. Here are a few quick steps to help you out with the process.
- Firstly, click on the Make It button to cut your design.
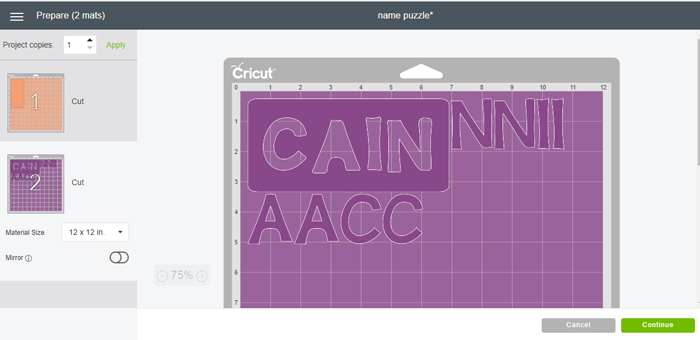
- After that, pick your machine and material type.
- Lastly, use a StrongGrip mat and masking tape to cut out the design.
With these steps, you can cut the material efficiently. Moreover, the Cricut puzzle Maker machine will enable you to cut accurately and precisely.
Step 3: Assembling the Name Puzzle
Once you’re done cutting, it’s time to assemble. A Cricut Maker machine helps crafters make amazing cuts on chipboard and wood. Follow the steps below to start assembling your project.
- Initially, use wood glue to put the designs together.
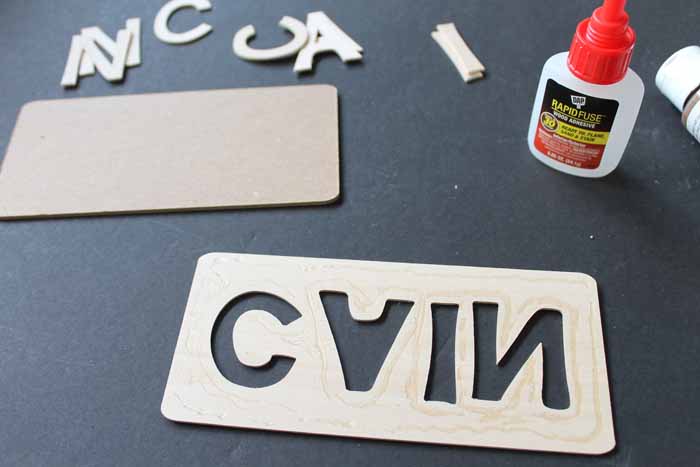
- Next, glue the letters together.
- Thereafter, stain or paint the glued letters perfectly.
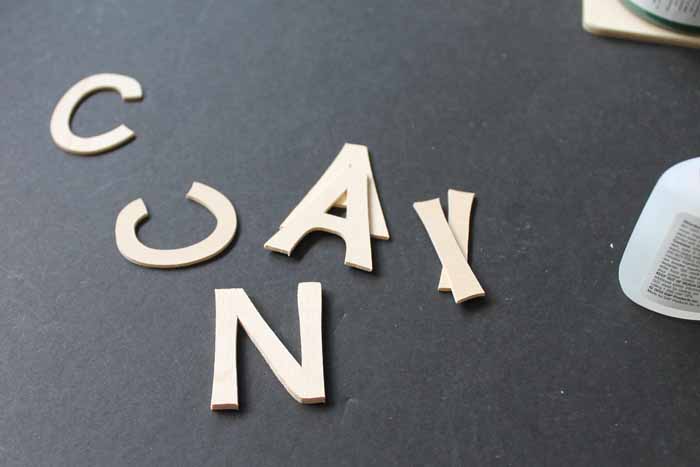
- Finally, allow the puzzle to dry completely.
After you execute the above three steps, you will return with a complete DIY puzzle to surprise your loved ones.
Conclusion
A Cricut Maker is a perfect go-to crafting machine. If you are a crafter, you can also use it to make personalized puzzles. The machine will help you efficiently create custom puzzles in the comfort of your home. So, learn how to make a puzzle with Cricut Maker using the three major steps: designing, cutting, and assembling the designs.
FAQs
What Supplies Are Needed to Make a DIY Photo Puzzle With Cricut Maker?
If you have a Cricut Maker machine, you can conveniently start making DIY photo puzzles. Here are a few supplies you will need for this project.
- Cricut Maker machine
- Cricut Knife Blade
- Sticker Paper
- Cricut cutting mat
- Brayer
- Masking tape
- Inkjet or laser printer
How Do I Make a Name Puzzle Using Cricut Maker?
Making a name puzzle is easy with a Cricut Maker machine. Also, it is time-saving. Follow the steps below to get started.
- Initially, go to Cricut Design Space.
- After that, make sure to design a perfect puzzle there.
- Further, move to the next step of cutting out the puzzle.
- Lastly, assemble the puzzle carefully.
How Do You Design a Puzzle in Cricut Design Space?
If you are looking for how to make a puzzle with Cricut Maker, the first step is designing the puzzle.
- First of all, sign into Cricut Design Space on your device.
- After that, select a new project and tap on images.
- Next, add the puzzle template to Canvas.
- Thereafter, upload the picture.
- Select print and cut image.
- Lastly, select the puzzle template, plus the image, and tap Attach.