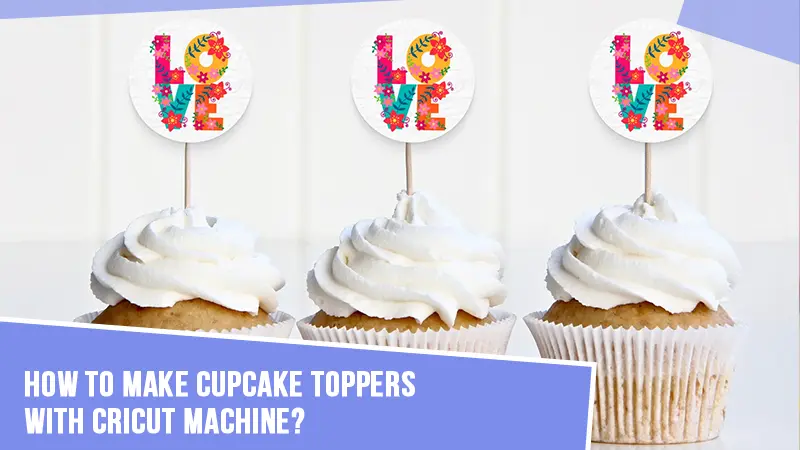
How to Make Cupcake Toppers With Cricut Machine?
I love eating cakes and decorating them, giving them a personalized touch. Last time, I was preparing for my mom’s 50th birthday and made my own cake topper with a Cricut machine. Do you know? My mom was quite happy, and all the guests praised me for my Cricut crafting skills. So, if you want to surprise your loved ones, I can teach you how to make cupcake toppers with Cricut. I will share my complete cake topper tutorial to help you with each efficient step.
Bring out your Cricut machine and get started with the journey of creating these fun cake toppers. I am sure you will receive lots of praise from your loved ones. Please note that I will discuss the process for a single-layer cake topper in this tutorial.
Let’s get into the procedure of making fancy cupcake toppers at home.
Materials & Tools You’ll Require for Making Cake Toppers
Cake toppers are pretty convenient to create. You can make it easily with your Cricut Explore, Maker, or Joy machines. But first, you will need to gather all the material you will need for this project. You can look at a few materials you will need for this Cricut project.
- A Cricut machine
- LightGrip cutting mat
- Cardstock of your choice
- Essential Tool set
- Scotch glue (Any craft glue of good quality)
- Cake topper sticks
- Scraper
- Cricut Design Space
If you want a professional and eye-catching topper, choose a high-quality cardstock. You can also go with rose gold glitter cardstock, multicolor glitter cardstock, or heavy-weight colored cardstock. It will make you learn how to make a cake topper with Cricut easily.
How to Make Cupcake Toppers With Cricut: Easy Steps
Once you start making a single layer, focus on every piece of your craft design. The final result will not be appropriate if you leave any letter unattached. Here is a step-by-step process to guide you.
Step 1: Adding Your Text, and Then Select
When making cake toppers, you must include the text you want. Follow these quick steps for the process.
- First of all, go to Cricut Design Space on your device.
- Then, type in the text you want for your cake topper.
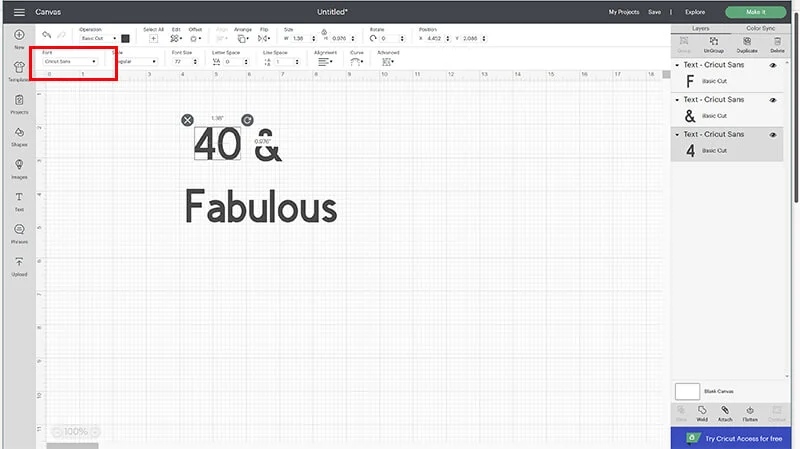
- If you want to change the font, select the font drop-down menu.
- After that, drag your arrow around the font to select them.
- Alternatively, hold down the shift
- Next, use the resize tool and give your font the size you want.
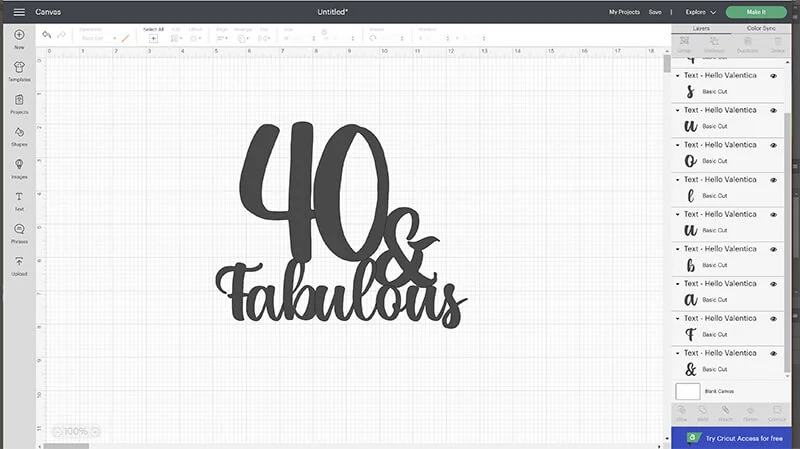
Step 2: Modifying the Font
The next step in making cupcake toppers DIY free is modifying the font in the Cricut app. You can look into the instructions below to start.
- Initiate the modification process by selecting your text.
- In the next step, select the text you have entered.
- After that, select Ungroup.
- Repeat the instructions to arrange all your letters.
- Now, make sure to resize all the fonts perfectly.
- Finally, rearrange your text.
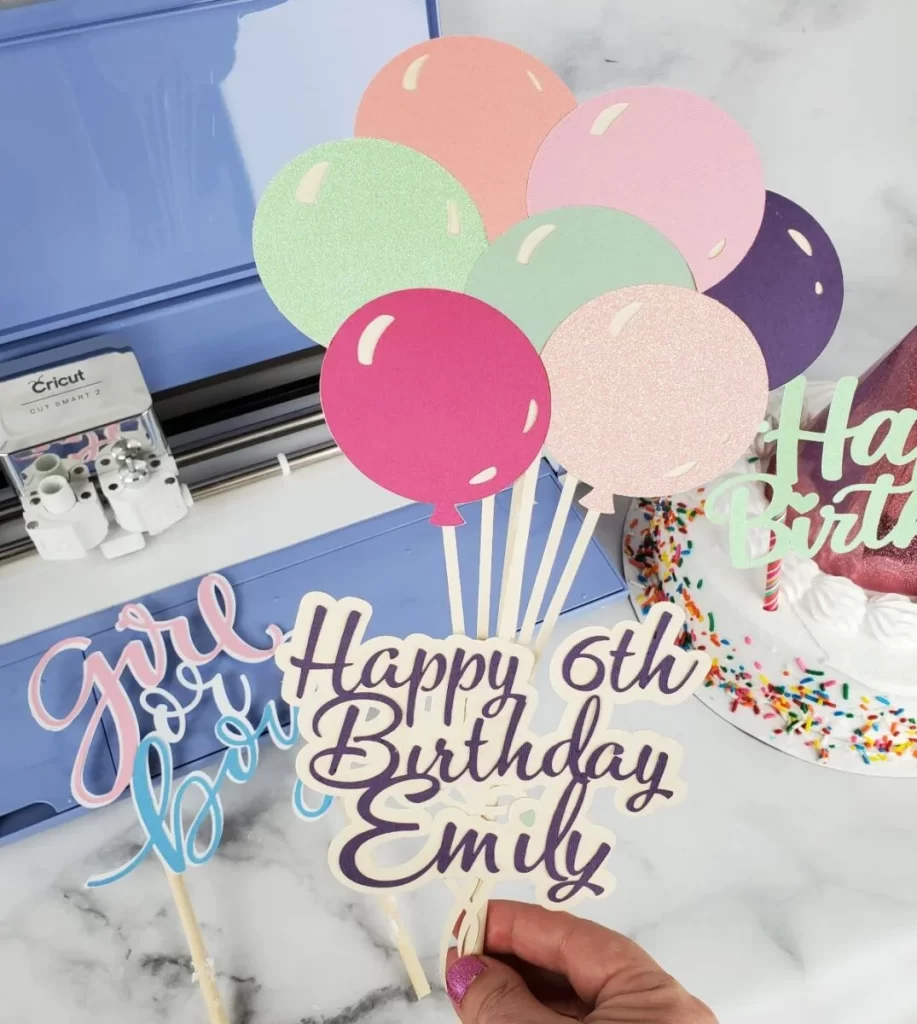
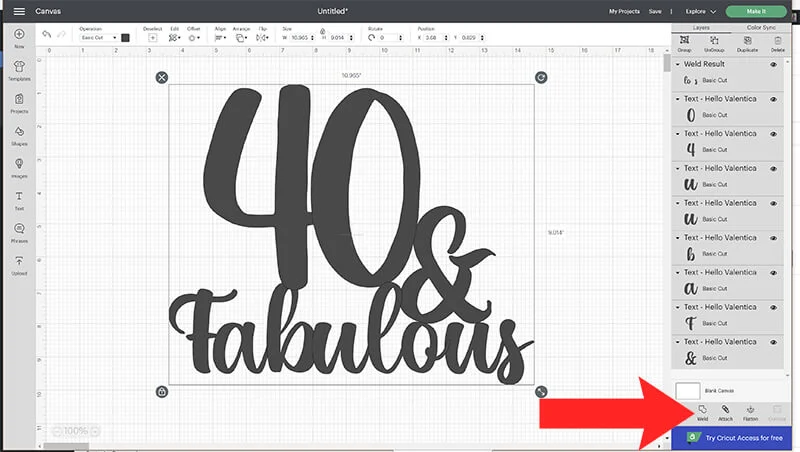
Step 3: Weld and Resize Your Cake Topper
The third step of making a single-layered cake topper is welding and resizing. Please consider welding instead of attaching the letters. Below are the steps to help you with making cake toppers.
- The first thing to do is select all the layers.
- After that, select Weld in the Cricut Design Space.
Step 4: Cutting the Cake Topper
If you are on the journey of learning how to make cupcake toppers with Cricut, the fourth step you can take is cutting the cake topper. Go along with these helpful instructions.
- Initiate the process by selecting Make It.
- Next, head to your Cricut cutting machine.
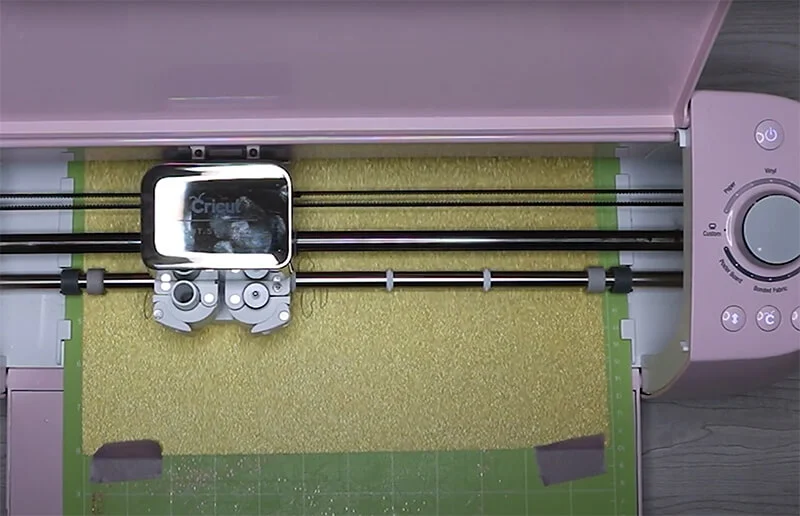
- Now, adjust the pressure on your machine.
- If using a Cricut Explore machine, turn the dial to a poster board.
- After that, use a sticky mat for cutting glitter cardstock
Step 5: Attaching the Stick to Your Cupcake Topper
The final step of making cake toppers at home is attaching the stick properly.
- Firstly, grab a stick for your cake topper.
- Then, find a craft glue.
- Finally, use that glue to attach the stick to the back of the cake topper.
You need to execute these five steps carefully for making cake toppers. Learn them and make the cake topper of your choice.
How to Add Multiple Colors to a Single Layer Cake Topper?
Do you want to make a cake topper that looks outstanding? The best option you can have is adding multiple colors. So, those learning how to make cupcake toppers with Cricut must also get into these steps. It will help them bring out creative and attractive toppers.
- Start by entering your text.
- Next, resize and rearrange your text carefully.
- Then, select the text you want to have a different color.
- Afterward, select duplicate.
- Following this, proceed with welding your new image together.
- Thereafter, make sure to weld your original design together.
- Now, look for the color fill option in the Cricut Design Space.
Conclusion
Cricut machine is great for crafting unique projects. So, you can do countless projects in your home when you have a Cricut machine. Making cake toppers is one of the most amazing and fun projects you can do alone or with your friends and siblings. Get started with learning how to make cupcake toppers with Cricut. You will need to have some required materials and tools, plus a little bit of effort.
FAQs
What Materials Do I Need to Make Custom Cake Toppers?
Are you planning to make custom cake toppers using your Cricut machine? The best material you can choose for this project is cardstock. It is a thick paper that goes well with DIY cake toppers. You can use plain, glitter, and foil cardstock to achieve the best result. Furthermore, add a shaker, including acetate and confetti, for a fancy look. Besides, you will need a bamboo skewer and acrylic stick.
How to Make Multilayered Cake Toppers?
If you want to add multiple colors and depth to your cake topper, you can begin with making multilayered cake toppers. You will need to use the Offset tool for this project.
- Begin by adding your text.
- In the following step, utilize the Offset tool for creating layers.
- Then, resize and cut the design.
- Lastly, assemble the Cricut topper.
How to Make Personalized Birthday Cupcake Toppers?
Do you want to learn how to make a cake topper with Cricut? Below are a few steps for the process.
- Firstly, cut out all the faces.
- After that, find a cardstock and cut out the triangle.
- Next, glue the cut onto the cut-out head.
- Then, glue your cut out.
- Now, you will have a head with a party hat.
- Apply some glue to the sandwich stick and your photo.
- Finally, add the personalized birthday party cupcake toppers.