
How to Make Wood Signs With Cricut Maker for Home?
Decorating the house is fun, isn’t it? I also love decorating my home with all the amazing stuff that I create with my Cricut machine. Today, I am going to talk about making a wall sign with a Cricut Maker machine. I hope you all are excited to learn it. Do you guys like wood signs to decorate your home? If yes, you can read this full blog and collect all the information about how to make wood signs with Cricut.
You can create a wooden sign using different materials such as iron-on vinyl, adhesive vinyl, etc. In today’s blog, I will use a stencil and adhesive vinyl, wood stain, and paint. I am picking painted wood to make it look more elegant and unique. Let’s get started with the blog and learn how to make a wood sign with Cricut Maker.
Tools and Materials Required for Your DIY Project
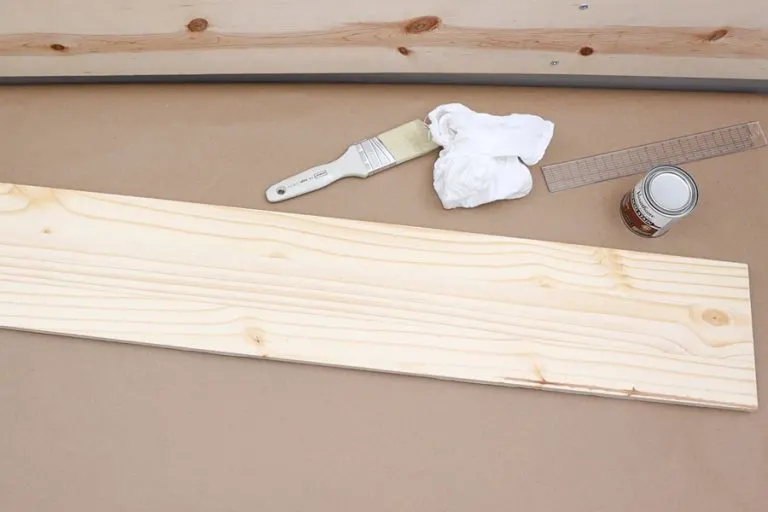
To initiate the project, you will need certain tools and materials to go ahead. Where will you find all this stuff? Let me tell you that. I often purchase my wood sign stuff from a hardware store, so should you. The great thing about a hardware store is that you get multiple options to choose from and also trained professionals to guide you about those materials. So, nobody will mind guiding you a little bit.
Here is the list of all the necessary items you will need in this project:
- Your Cricut Maker machine
- Cricut mat (Standard Grip mat)
- Weeding tool
- Transfer tape
- Permanent adhesive vinyl
- A lint-free cloth
- Stencil brush
- Paint
- Paper
Get ready with all these items and start making your wood sign for your home decor. If you haven’t set up your Cricut Maker, you can watch this video tutorial to learn it easily by clicking here:
How to Make Wood Signs With Cricut Maker?
I am using my Cricut Maker; you can use any Cricut machine except for Cricut Joy. As my wood sign is bigger, I am using a 12 x 12 mat, but I would advise you to use a slightly bigger mat, at least 12 x 24. After that, you can go ahead with the steps mentioned below.
Step 1: Make a Guideline for the Wooden Sign
First of all, tap on the Shapes icon, pick a square, and drag it to the Design Space canvas. When you add the square, it will be grey and locked by all proportions. Then, choose it and unlock all the proportions from the top menu. Make that square according to your wooden
board.
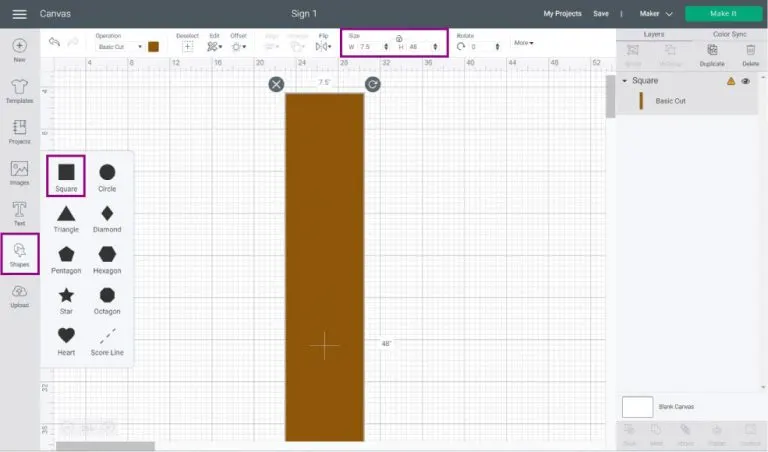
You may change the color as per your choice. Choose the Images option, select the color box with the Operations option, and then pick a color you want to add. When you know how to make a stencil for wood sign with Cricut, you are good to go to the next steps.
Step 2: Select and Upload a Design
You will get the design file and template according to your choice from the Design Space library. So, once you select the file or download an external file. Upload it by hitting the “Upload” button from the left panel of Design Space. Move to the Upload Image section, go with the on-screen prompts, and choose your image under the “Recent Uploads.”
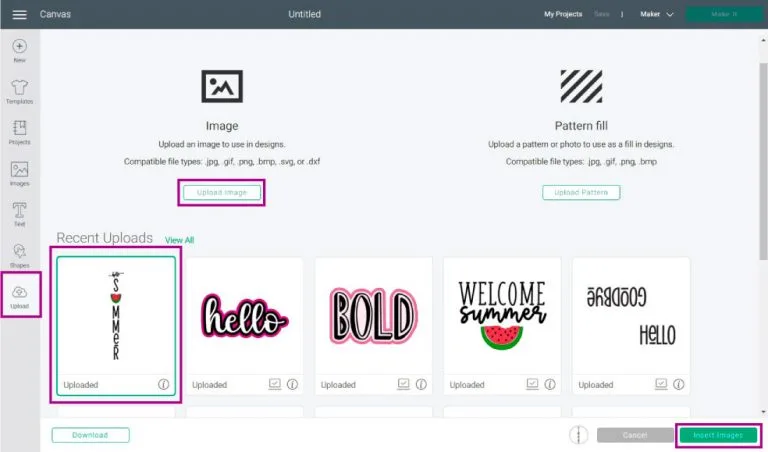
At last, hit the “Insert Images” option. Once you are done, move ahead to learn how to make wood signs with Cricut Maker for home.
Step 3: Organize Your File
Now, you need to resize your final image. You need to make the design fit into the wood sign. It is easier to resize the image from the top panel. Also, I am leaving an inch from the top and bottom on the wood sign to fix the design correctly. Once you have resized the image, choose the “Ungroup” option to add some extra effects to your design.
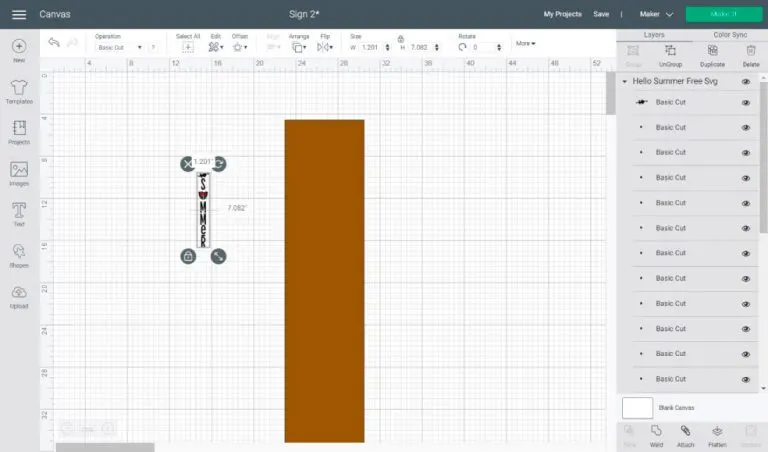
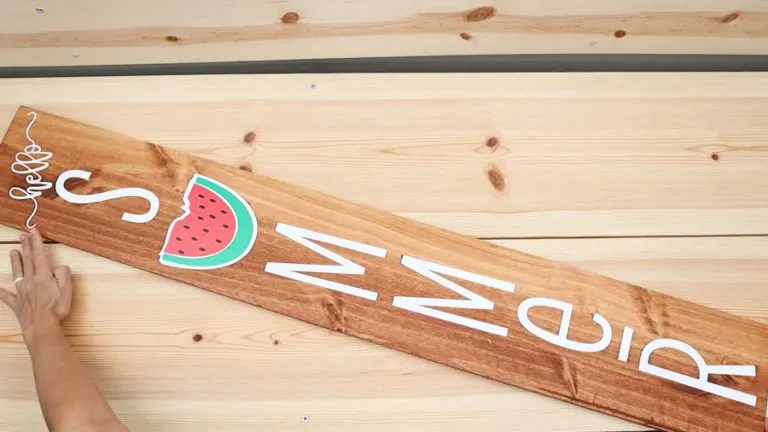
Here, I am adding a watermelon sign below the letter S to make it more creative. Plus, I rotated the “hello” word. That’s how you can edit your project after resizing it. Now, you can also change the color of your letters.
Step 4: Apply the Registration Marks
We have a limited mat size for the Cricut Maker and Explore family. It can be annoying when you are working on a large project like a wood sign. Therefore, to perfectly cut a large project, you can make some registration marks to make a precise design.
I am using stars as they have multiple angles. You can rather use a square, but avoid using a circle as it will align irrespective of the angle. To add a star, go to the Shapes option on the left panel and alter the operation from Basic Cut to Pen.
Then, hit the “Duplicate” button from the top layers panel. Next, select your stars, hit the Align option at the top of the menu, and hit the Center option. When you are done with the stars, you can duplicate them to place them anywhere on your wood sign.
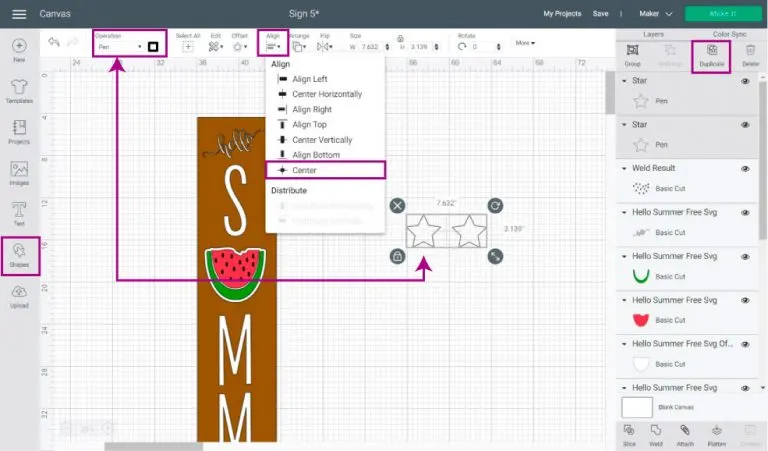
The purpose of using stars is to understand the point of joining your letters while using a stencil on your wood. You should apply the registration marks according to the size of your mat.
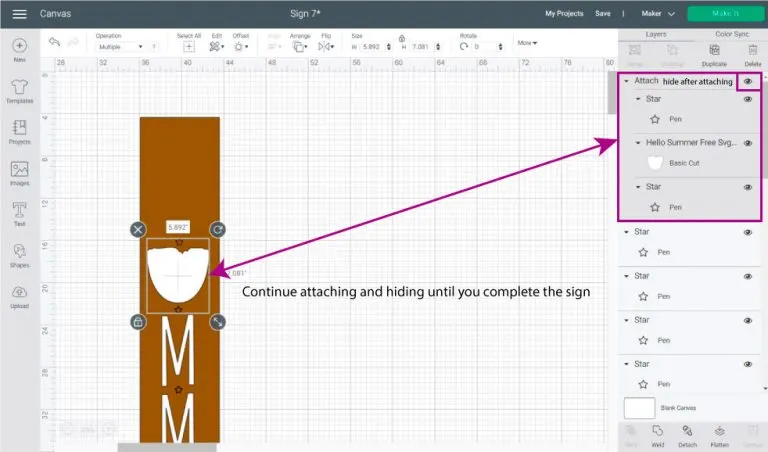
As my mat is 12 x 12, I can’t use a large design. So, if you have a large mat, you can add more letters. To attach everything on the mat, you need to click on the Attach button. Making registration marks at the bottom and top is easiest. But the middle one is a little trickier as you will have to select the star on the top and bottom of each letter. For instance, observe the watermelon outline.
Step 5: Send Your Project for Cutting
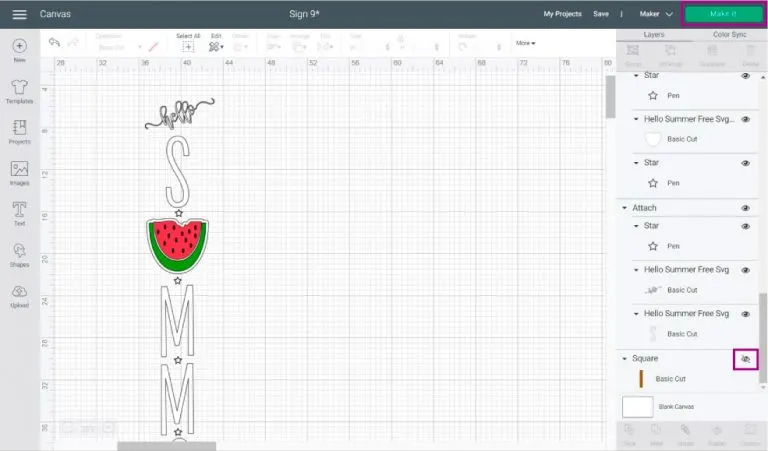
When you are done with attaching your letters to the registration marks, you can delete the guidelines and hit the “Make It” button to send your project for the final cut. Now, look at the final steps on how to make wood signs with Cricut.
Step 6: Preview the Cricut Mat
In this option, you will be given certain options to go ahead with your project. In this step, you will need to select the material you want to use. Your Cricut machine will show you a preview of your project.
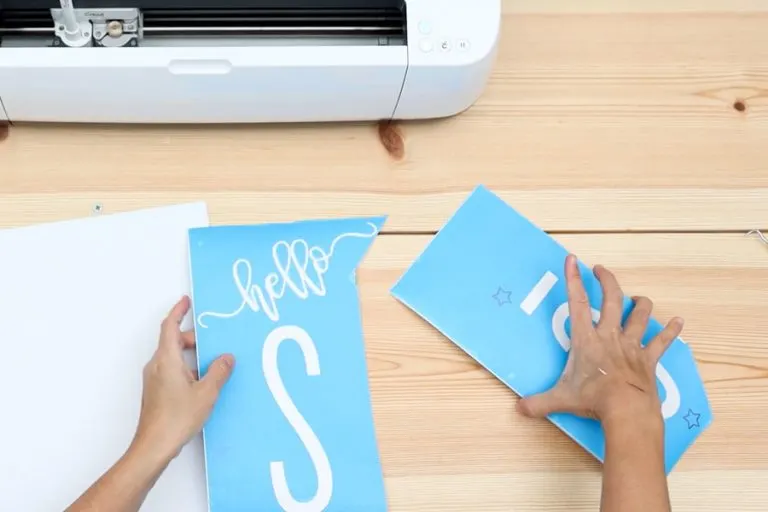
Step 7: Select Your Material and Start the Cutting Process
Your machine will ask you to select a suitable material from Design Space. You can select the material of your choice by moving the dial. In this project, I chose a non-Cricut material for stencil and a permanent vinyl for the watermelon.
After that, insert a Cricut marker into clamp A and a fine point blade into clamp B. Now, put the stencil film on your mat, insert it into your Cricut machine, and hit the Go button to get started with the cutting.
Once your machine finishes cutting, remove the mat and take out the excess material from the project. Now, flip the mat and bend it a little bit to take the cutting part out. Change your material and load it on different Cricut mats. Then, you can trim your project with a pair of scissors.
Step 8: Stain the Wood
Once you prepare your designs, it’s time to stain your wood. Place your wood in a clean and ventilated area and then shake the wood stain. Now, take a wood grain and stain your wood with that. So, first of all, soak a clean, lint-free cloth in the stain and then soak it around your wood. When you are done, you can remove the excess stain from the wood.
Step 9: Put Your Stencil on Your Wood
Now, take your stencil and make an idea of how you are going to place it on your wood. Get some transfer tape to adjust the stencil correctly on the wood. Use it for all the letters. Then, you can also use a masking tape to secure the stencil in place. Once you secure the stencil, raise the transfer tape and cut your carrier sheet. When you are done, take off the masking tape.
Conclusion
Finally, you know how to make wood signs with Cricut Maker for the home. As the last step, you can add the adhesive vinyl to your wood to make a perfect Cricut wood sign. This summer wood sign would be perfect to use at your door to impress every guest. Similarly, you can make a wood sign for winter or use any other word or phrase on your wood sign. You can use any Cricut machine to make a perfect wood sign.